 Bank payments
 Card payments
 Apple Pay / Google Pay
 POS terminals
 Buy Now, Pay Later
 Shipping+ and Shipping+ Pro
 Refunds
 Recurring payments
 Payment link
 Donations
 Kniks gift card
 Merchant financing
 Payments for accommodation businesses
 Payments for service businesses
MakeCommerce module for Wix
To start the integration of MakeCommerce module on Wix platform, you first need access to MakeCommerce merchant portal. Access is granted after signing the contract.
Adding the payment module
Adding payments on the Wix platform is very simple.
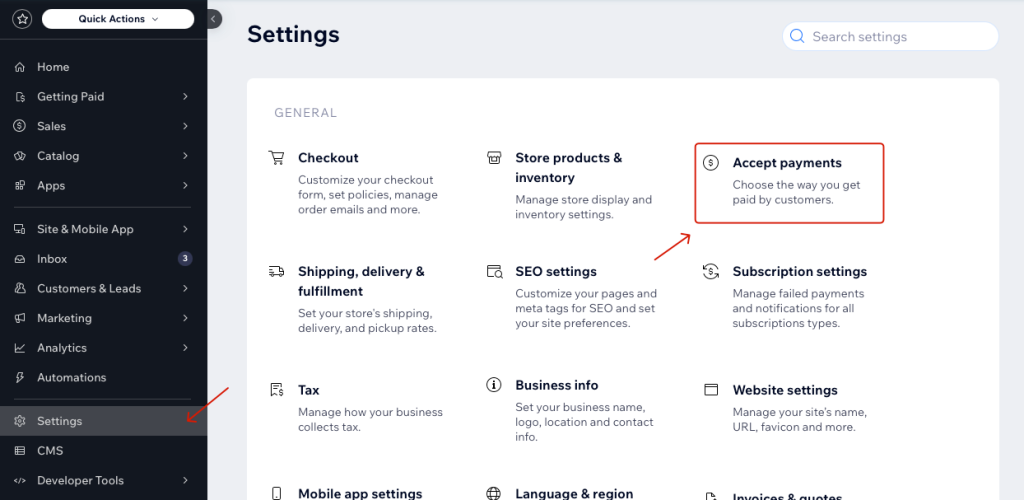
- In the Wix admin panel, go to Settings -> Accept Payments:
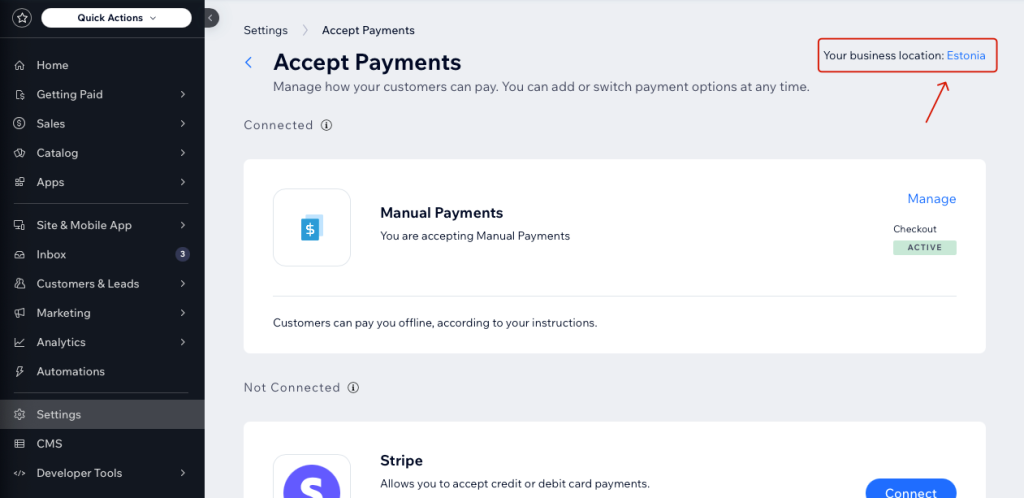
- Check if your business location is set to one of the three Baltic countries. If not, change it by clicking on the country name:
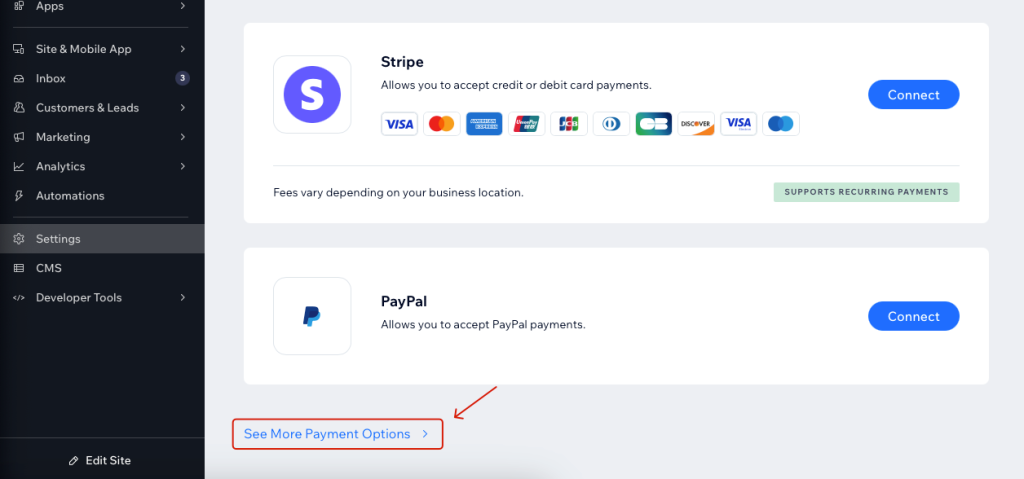
- Click on See More Payment Options:
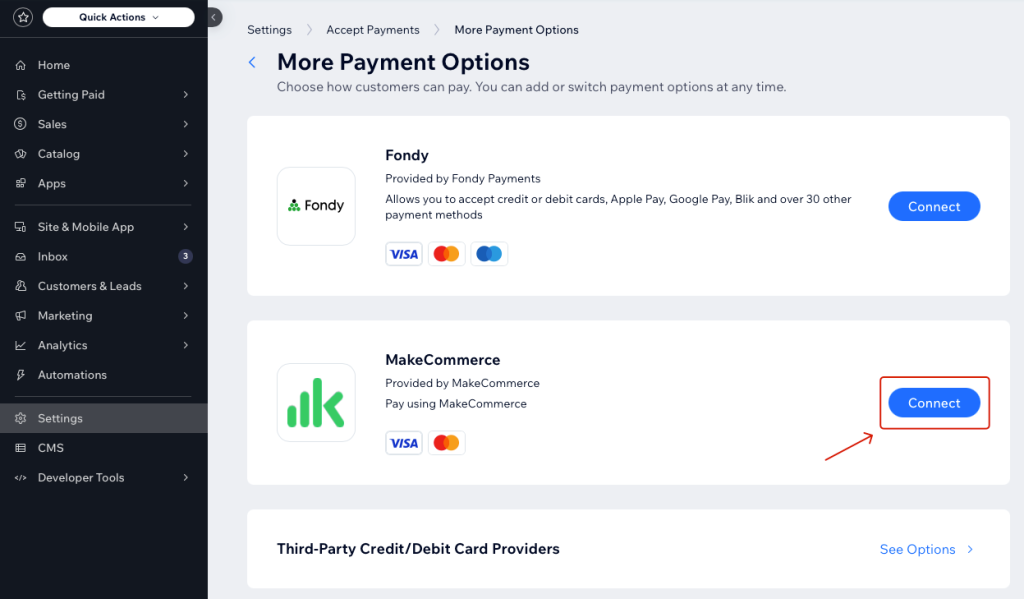
- Click Connect next to the MakeCommerce block.
- Next, enter your Shop ID and Secret Key, which can be found in your merchant portal under Settings -> API.
*Only live API keys can be used on Wix platform. Unfortunately, Wix platform does not allow connecting to the test environment.
- Click Connect:
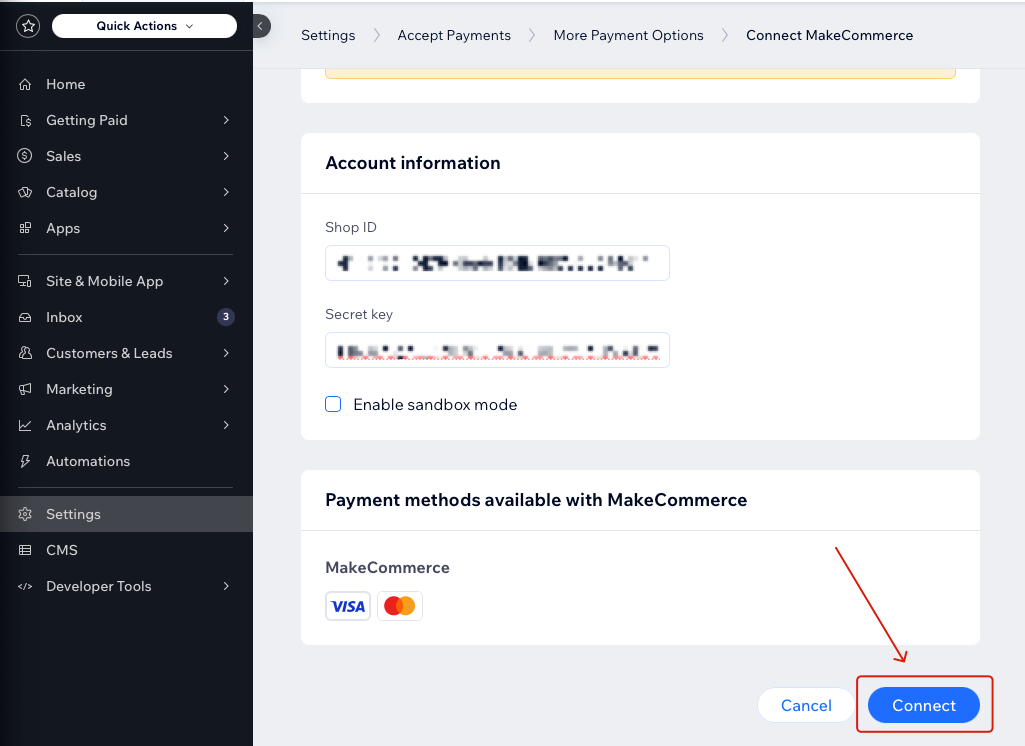
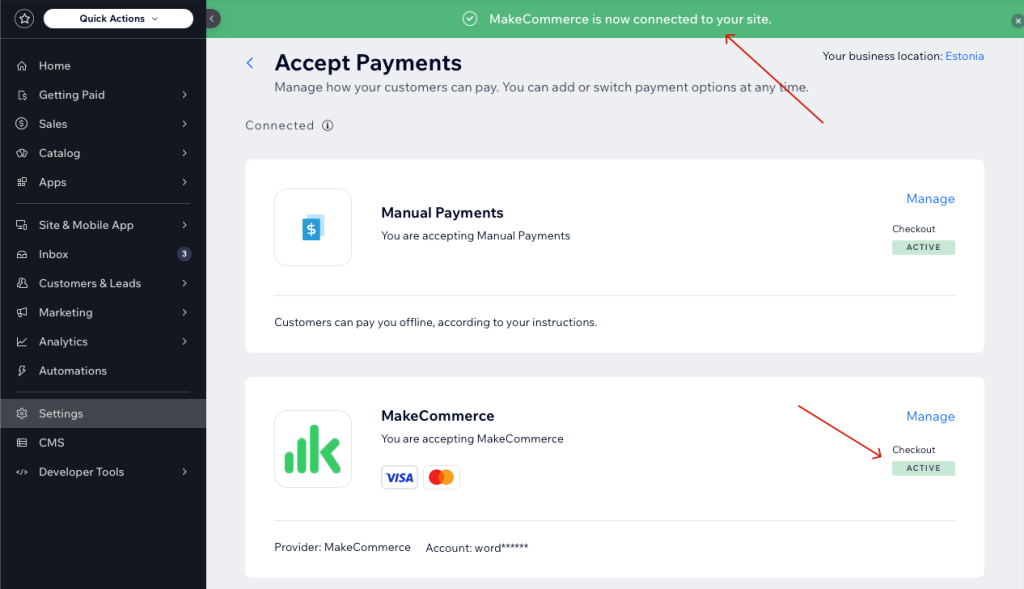
- If everything has been entered correctly, you should see the following message, and MakeCommerce payments will be activated in your store:
Adding the delivery module
MakeCommerce shipping module is available in Wix App Marketplace. You can install it using this link: https://www.wix.com/app-market/web-solution/makecommerce-shipping/.
For delivery, you can choose between two packages: Shipping+ and Shipping+ Pro. The latter also allows you to use your own contracts with delivery partners. You can learn more about the differences between the packages here.
- After opening the app link, if prompted, select your store.
- Next, as with the payment module, you will need to enter your MakeCommerce API keys. Enter your Shop ID and Secret Key, which can be found in merchant portal under Settings -> API.
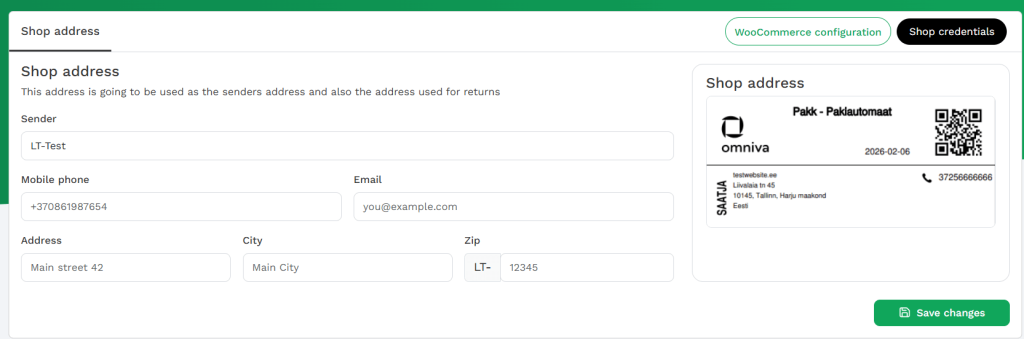
*Only live API keys can be used on Wix platform. Unfortunately, Wix platform does not allow connecting to the test environment. - Then, enter your store address.
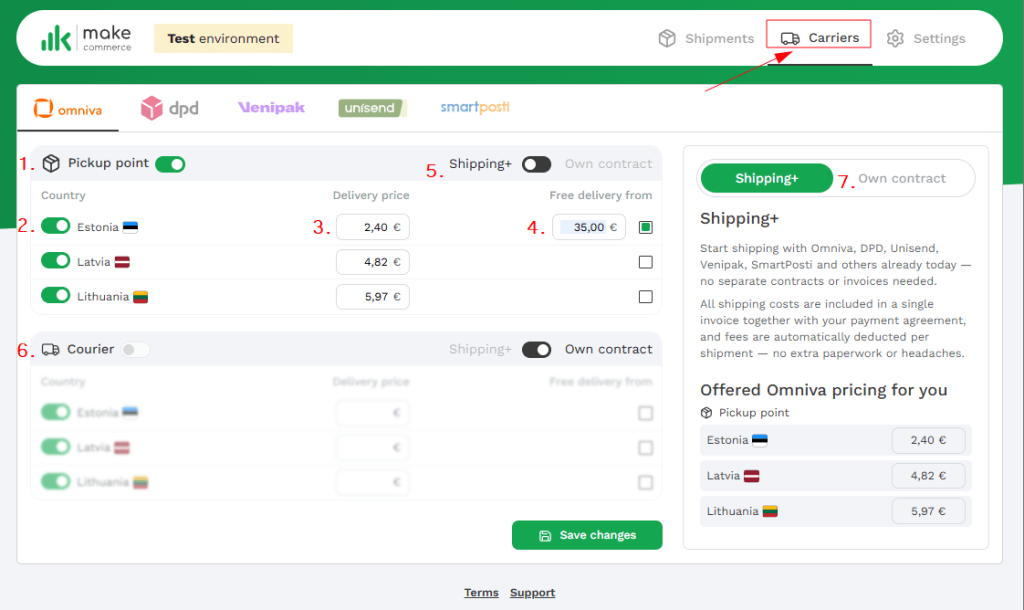
- Shipping methods are activated automatically, but you can modify them by opening Carriers, and you can also enable free shipping: 1. Select and activate a carrier (Carriers → Pickup Point). 2. You can choose whether to offer the shipping method in a specific country. 3. Shipping price: initially set automatically based on the MakeCommerce Shipping+ service, but you can customize it later. 4. To activate free shipping, tick the relevant checkbox and enter the minimum amount for free delivery. 5. You can choose whether to offer shipping via our Shipping+ service or based on your own contract. If using your own contract, you must enter business customer contract details with the specific carrier (see step 7). For this, Shipping+ Pro must be activated. 6. Option to activate courier service. The Shipping+ service includes Omniva courier delivery within Estonia and from Estonia. The other courier methods can only be activated if adding your own business customer contract details with delivery company (Shipping+ Pro). After saving the details, courier delivery can be enabled for specific countries, along with pricing and free shipping settings. 7. To enter the contract details, select Own Contract.
- After entering and saving the data, you need to configure shipping zones.
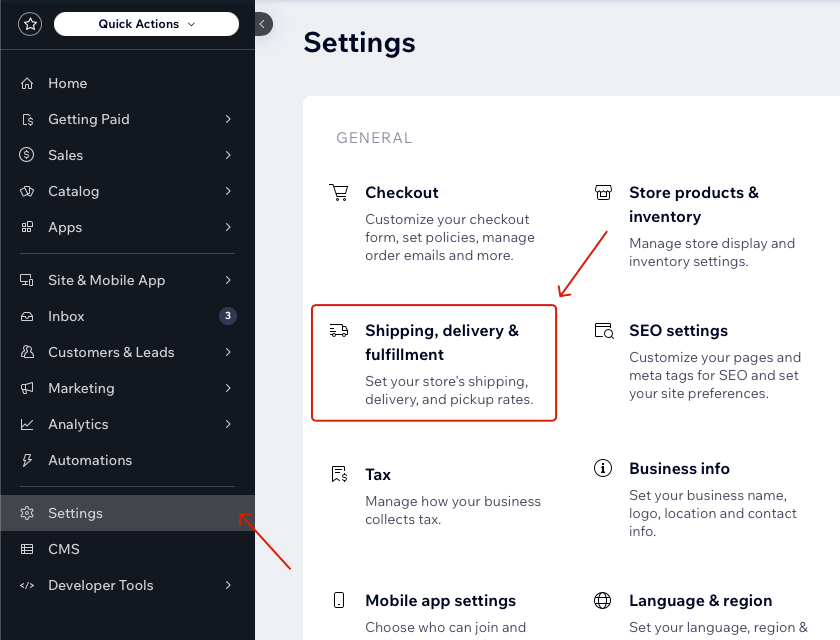
- To do this, go to Settings → Shipping, Delivery & Fulfillment:
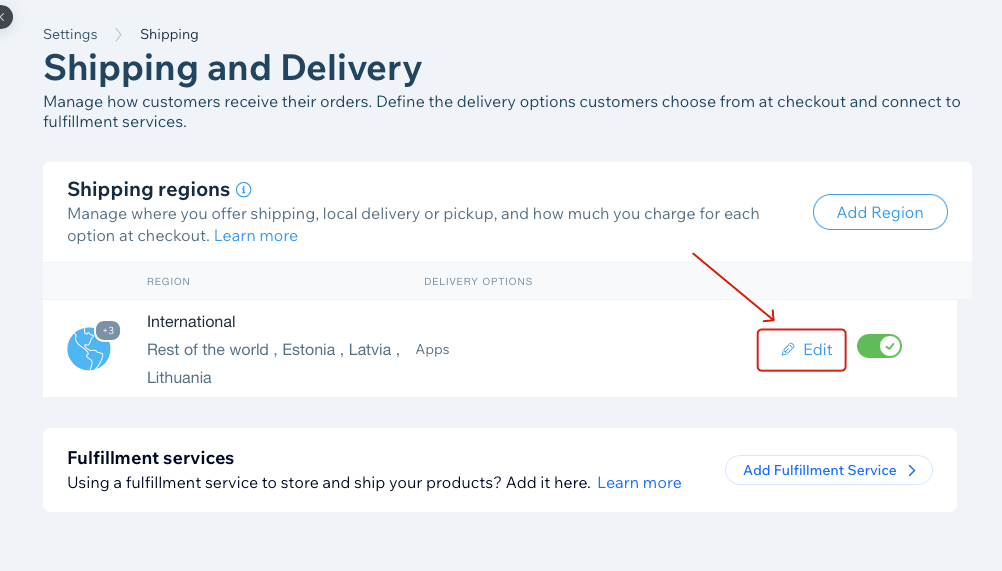
- If everything is set up correctly, you should see this notification, and MakeCommerce shipping will be enabled in your store:
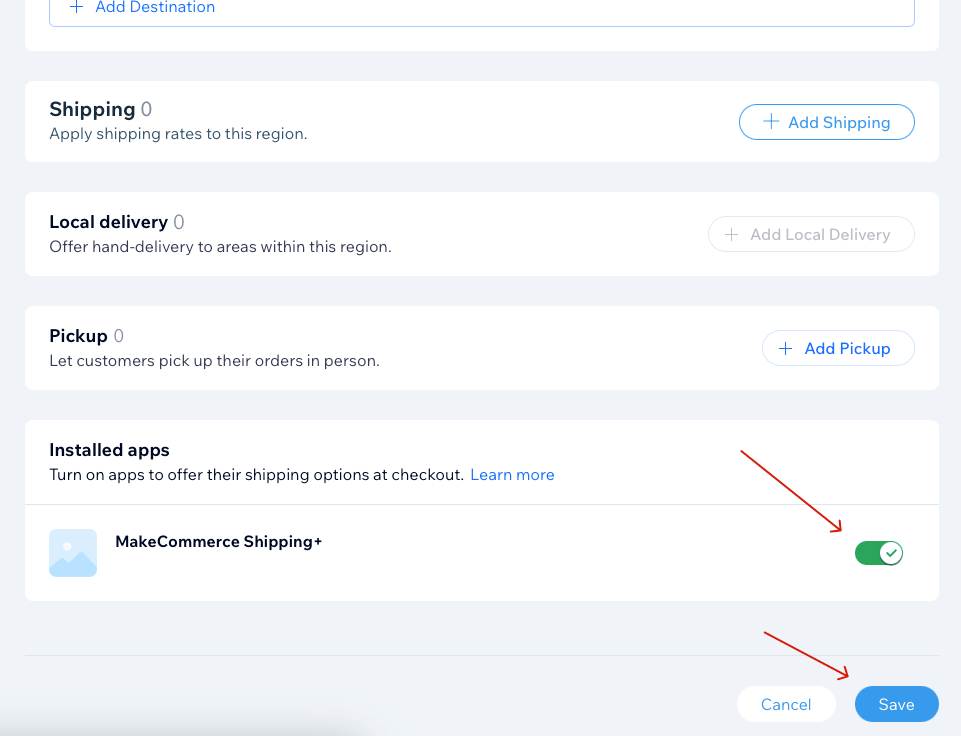
- At the bottom of the page, you should see the option to enable MakeCommerce Shipping+. Turn it on and save the changes:
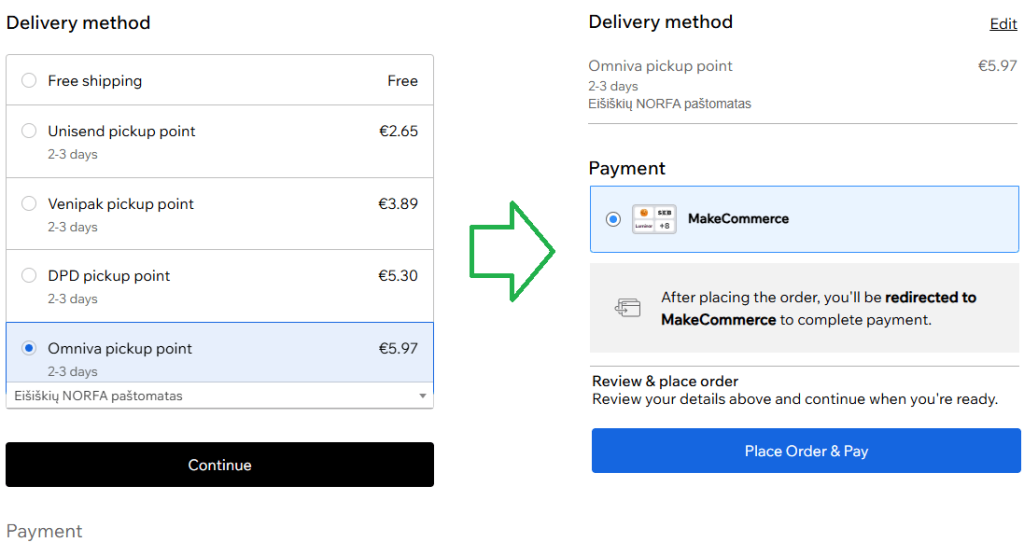
- Payment and shipping setup is complete! Both shipping and payment methods are now available in your store:
Delivery method changes
To enable or disable a shipping service provider, click on Carriers on the plugin’s main page. Here, you can toggle specific carriers on or off, adjust pricing, enable free delivery, and set the minimum order amount for free shipping. Additionally, you can choose whether to use the Shipping+ service or your own existing carrier agreements – Shipping+ Pro.
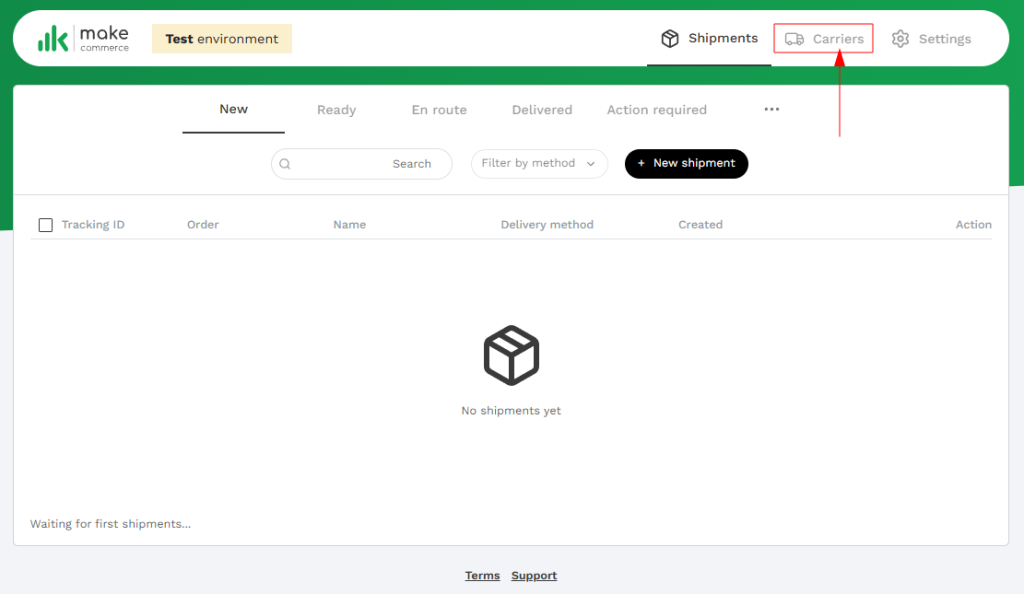
Shipment processing
Once the first order has arrived, it will appear in this list. Here you can:
- View the tracking code and see real-time delivery updates
- Modify shipment details
- Print a single shipping label
- Print multiple shipping labels at once
- Filter shipments by carrier
- Filter shipments by status: New; Ready; En route; Delivered; Action required; All shipments.
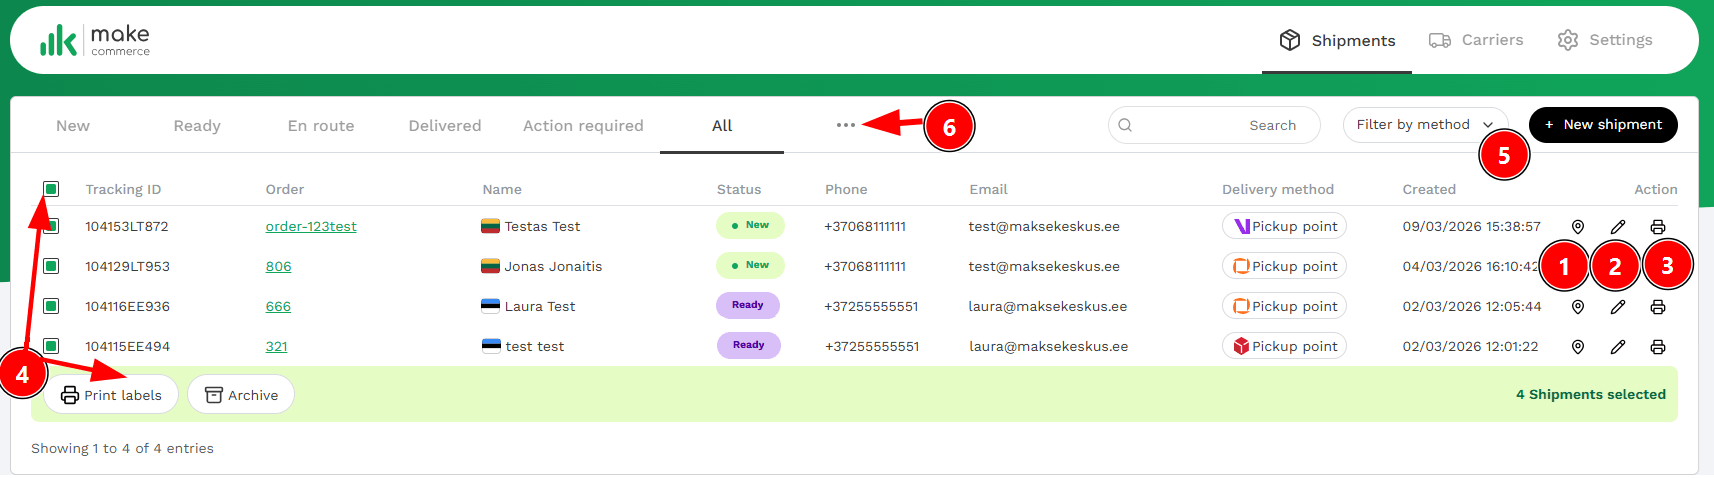
If the shipment is no longer relevant, click Archive to remove the shipment from the shipping app.
To print multiple parcel labels mark the shipments and open Bulk actions – Print labels. The parcel label format can be selected in Settings – Module setup. Selecting A4 will print a maximum of four parcel labels per page and selecting A6 will print the parcel label separately on one page.
Manual shipment creation
If a technical issue occurs or you need to create a separate shipment, you can do so manually from the MakeCommerce plugin’s main page.
Click the +New Shipment button and fill in the required details.

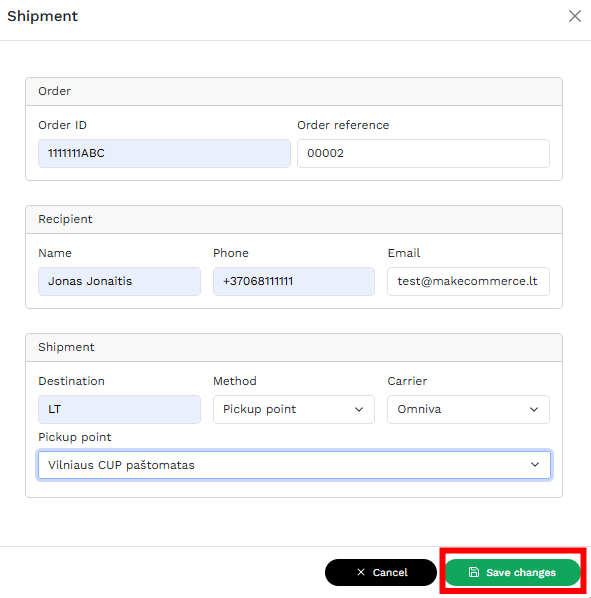
Save the changes – the created shipment will appear in the list.
Shipping+ Pro activation
By using the Shipping+ Pro package, you can send parcels based on your existing business contract with a delivery provider or use courier services that are not included in Shipping+.
- Sign a contract with your chosen delivery provider.
- In your e-commerce platform, open the MakeCommerce module → select Carriers → Omniva / DPD / Venipak / Unisend / SmartPosti → Own contract → enter API keys → Connect.
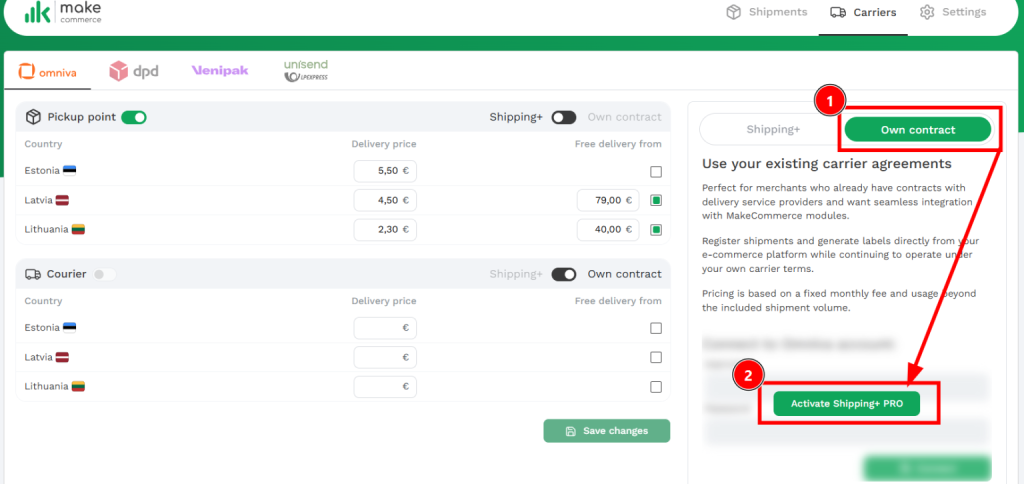
- An activation window will open. Make sure to review the contract terms, as the monthly fee will be applied immediately.
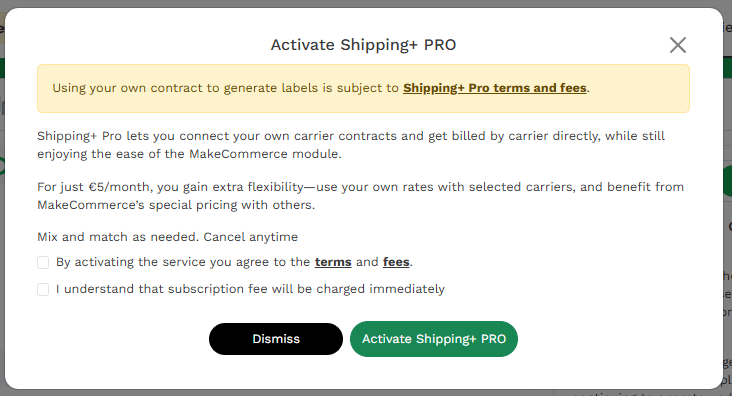
- Confirm the terms and activate the Shipping+ Pro package.
- A page will open with fields where you need to enter the API key or username and password provided by the delivery company.
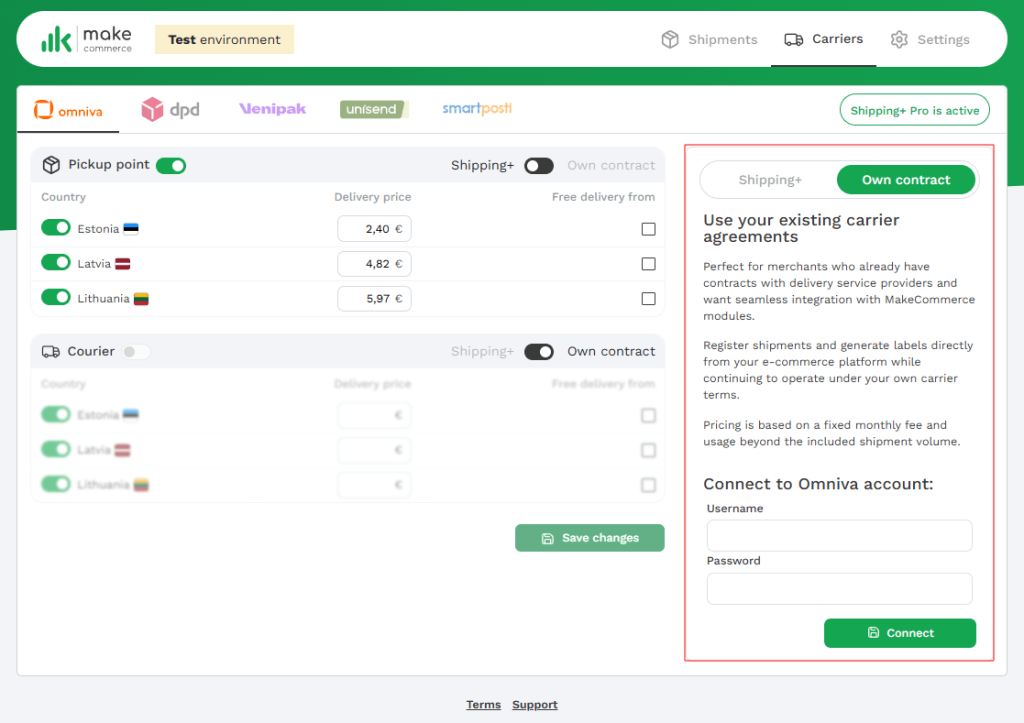
Save the changes.
After activating Shipping+ Pro, you will see the message: Shipping+ Pro is active.

Cancelling Shipping+ Pro
If you wish to cancel the Shipping+ Pro package, open the Carriers view in the MakeCommerce app. Click Shipping+ Pro is active and confirm the cancellation. You can continue using the benefits of the subscription for up to one month from activation. You can reactivate the subscription at any time if needed.
!!! Important: After cancelling the subscription, you will no longer have access to shipping labels created under your own contract.
Have an issue or questions?
Contact MakeCommerce technical support by emailing support@maksekeskus.ee, support@makecommerce.lv, or support@makecommerce.lt.