Bank payments
 Card payments
 Apple Pay / Google Pay
 POS terminals
 Buy Now, Pay Later
 Shipping+ and Shipping+ Pro
 Refunds
 Recurring payments
 Payment link
 Donations
 Kniks gift card
 Merchant financing
 Payments for accommodation businesses
 Payments for service businesses
MakeCommerce module for PrestaShop
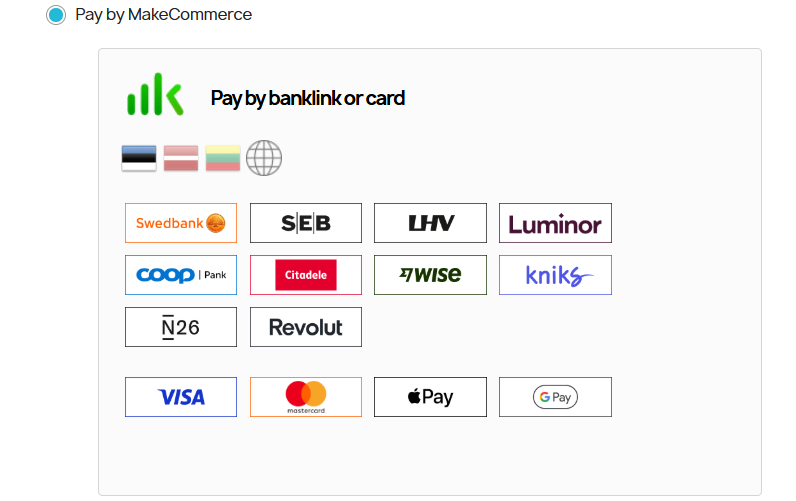
How to set up payment acceptance in your PrestaShop store? Our plugin allows you to easily integrate bank payments, card payments, Apple Pay, Google Pay, and payments from digital banks like Revolut, N26, and Wise. You can also add delivery options from Omniva, SmartPost, DPD, and LP Express to your store.
Setting up the MakeCommerce plugin
You can download the latest version of the module here:
- PrestaShop 1.7 – 9.0 makecommerce-3.4.1.zip (3.4.1 – 26/01/2026)
- Only payments 1.7 – 9.0 makecommercepayments-1.0.5.zip (1.0.5 – 26/01/2026)
- PrestaShop 1.6 makecommerce.zip (2.0.9 – 25/06/2020)- no updates or bugfixes will be done for this version.
Downloading the module is free of charge, as are all future updates.
- To install the MakeCommerce module in PrestaShop, you need to upload the module file (makecommerce-xxx.zip) from your computer. During installation, PrestaShop may display a warning: “You are about to install a module that is not verified by PrestaShop.” – this is OK, you can proceed.
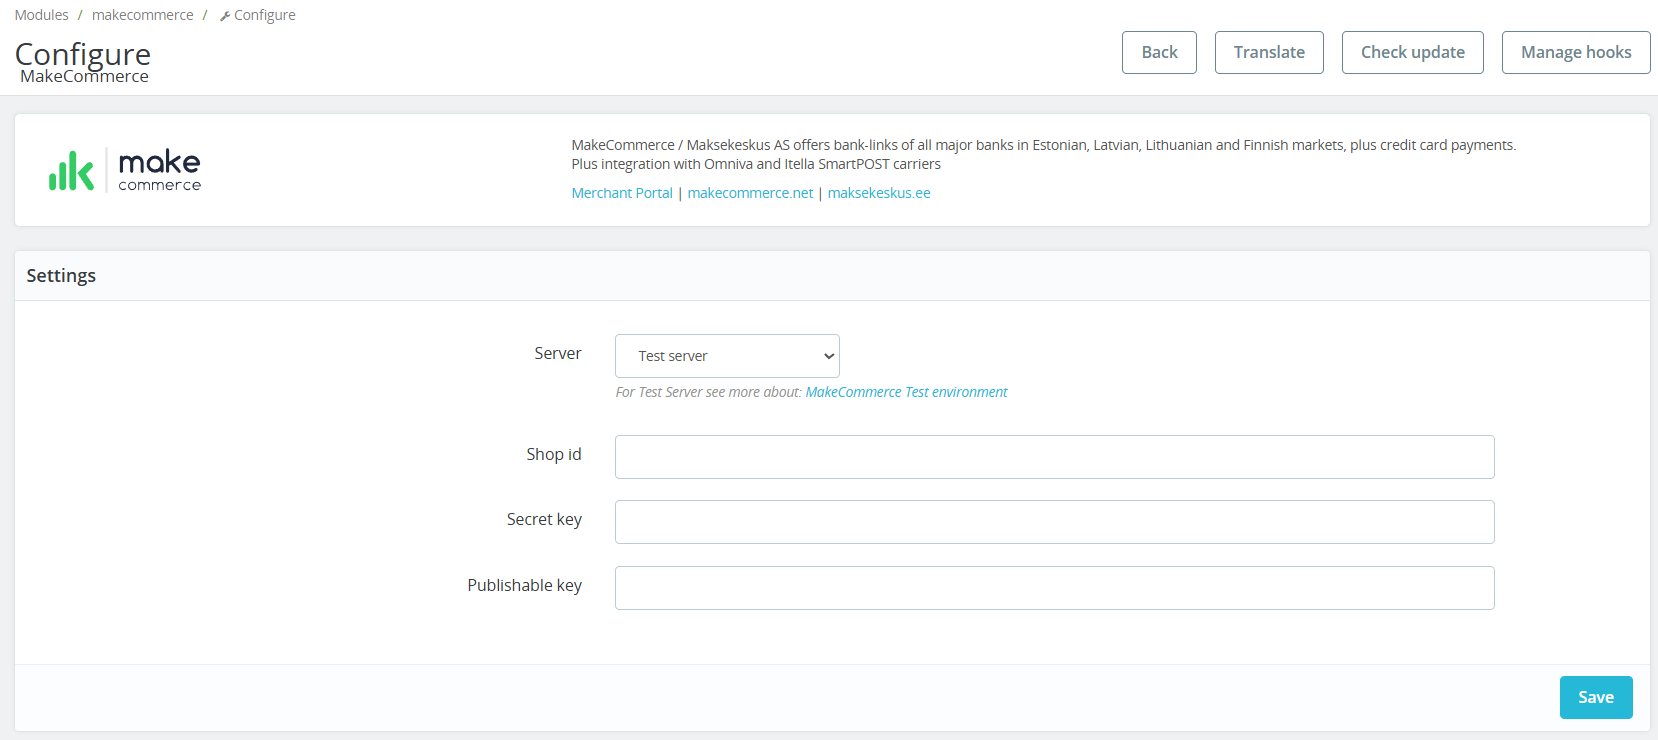
- After uploading and installing the module, you need to configure it by entering the API keys, which you can find in the MakeCommerce self-service under Settings > API after signing up.
Adding payment methods
- With our module, you can add bank links, card payments, and/or other payment methods to your store, depending on the options you selected when signing up with Maksekeskus.
- In the module settings, define how the payment methods are displayed so that they better match the look and feel of your store.

Adding delivery methods
The MakeCommerce module also allows you to add delivery methods to your store. For Omniva and DPD parcel machine delivery in Estonia and Latvia we offer a solution that does not require signing a separate contract with the delivery providers – see the shipping+ service.
To integrate other delivery methods (Omniva and DPD courier services, SmartPosti, and LP Express), you must first enter into a business customer agreement with the delivery provider. To conclude the agreement, please contact the respective delivery company.
- If you are using your own contract with a delivery company, you must enter the business customer contract credentials provided by the delivery company in order to establish the integration.
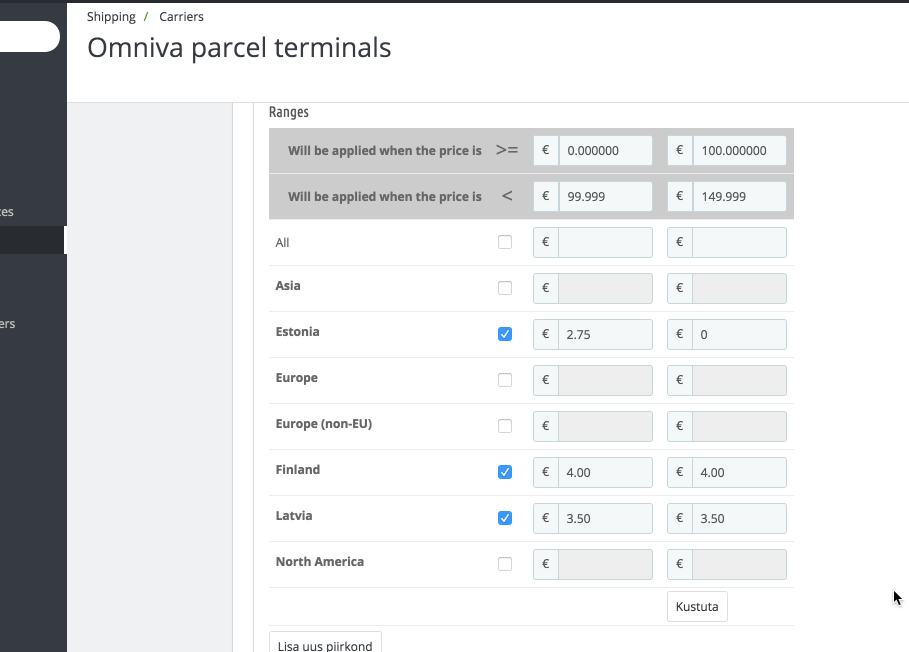
- Once the delivery service is activated, a corresponding delivery method will be added to your store (Shipping- Carriers), where you can further configure it according to PrestaShop’s capabilities—such as setting prices, etc. Delivery zones are automatically defined.
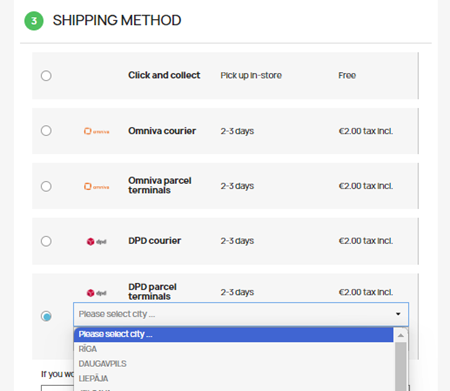
- On the store’s Checkout page, the relevant delivery method will be displayed along with the price, and in the case of parcel machine delivery, a list of available parcel machines for selection will also be shown. The store fetches the latest list of parcel machines from Maksekeskus’ server—this requires that the above-mentioned API settings are configured correctly.
- At checkout, delivery methods are displayed based on the destination of the package.
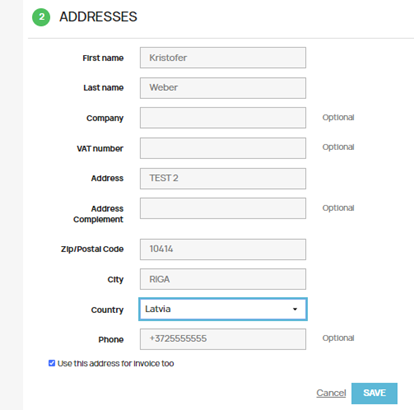
- Depending on the selected countries, with a standard PrestaShop installation you can take the following steps:
- Define the corresponding delivery zones: “Estonia”, “Latvia”, “Lithuania”, and “Finland”
- Assign the respective countries to these zones and activate the countries
- Set different prices for each zone under the corresponding delivery method
- If you wish to offer free shipping for higher-value purchases, configure the delivery cost to depend on the value of the shopping cart.
Shipping+
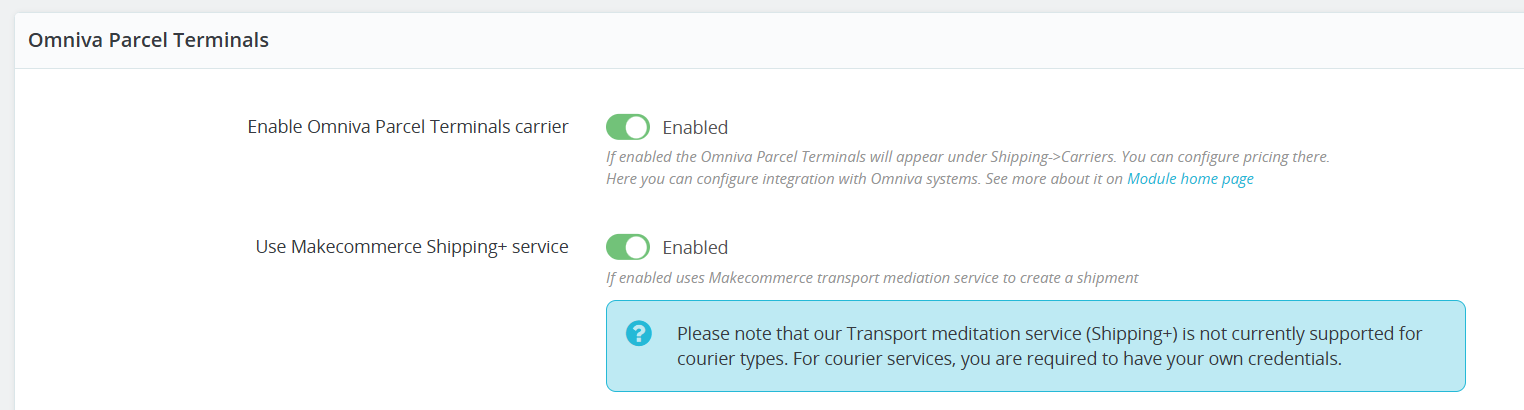
Shipping+ allows you to send parcels through MakeCommerce without signing separate contracts with delivery companies. The service is available for deliveries via Omniva and DPD parcel machines in Estonia and Latvia.
With Shipping+, all delivery-related fees are automatically deducted from your MakeCommerce account balance. The cost of a shipment does not depend on the size of the parcel. You can find full details about the service and pricing in our pricing list.
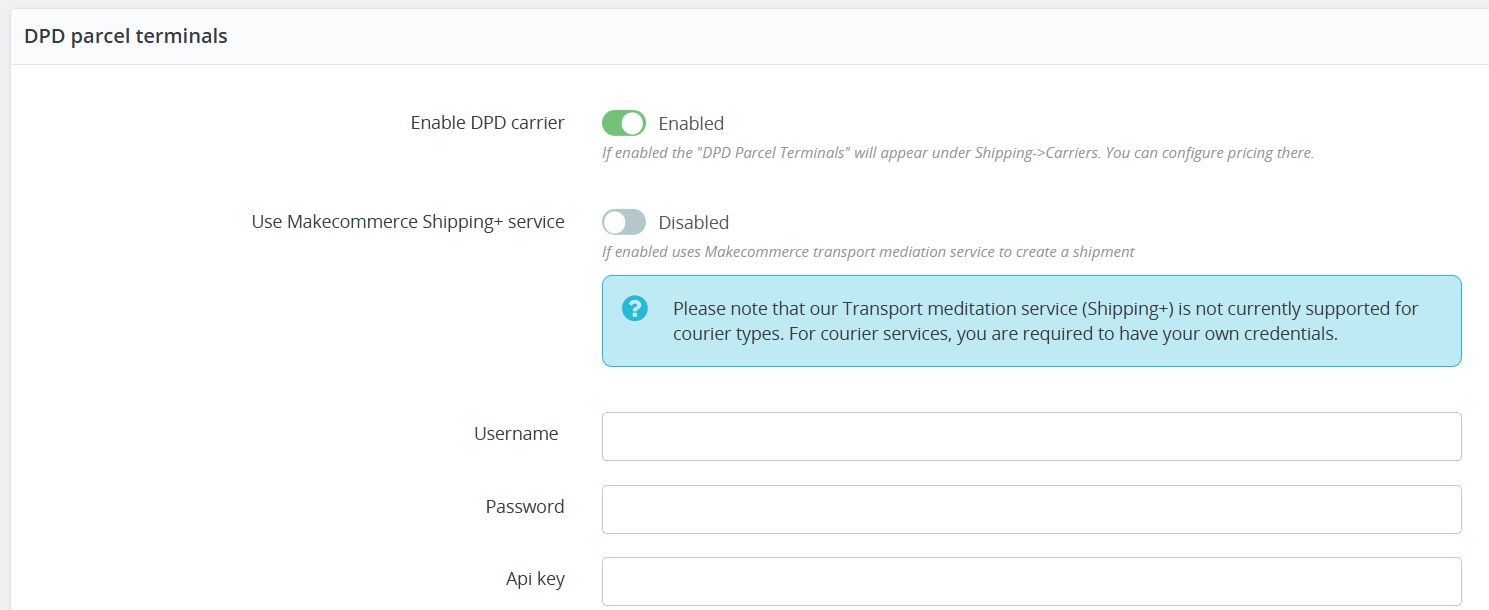
- In admin view choose Modules- Module Manager and select MakeCommerce plugin- Configure. Enable Use Makecommerce Shipping+ service to use Shipping+ service for Omniva and/or DPD.
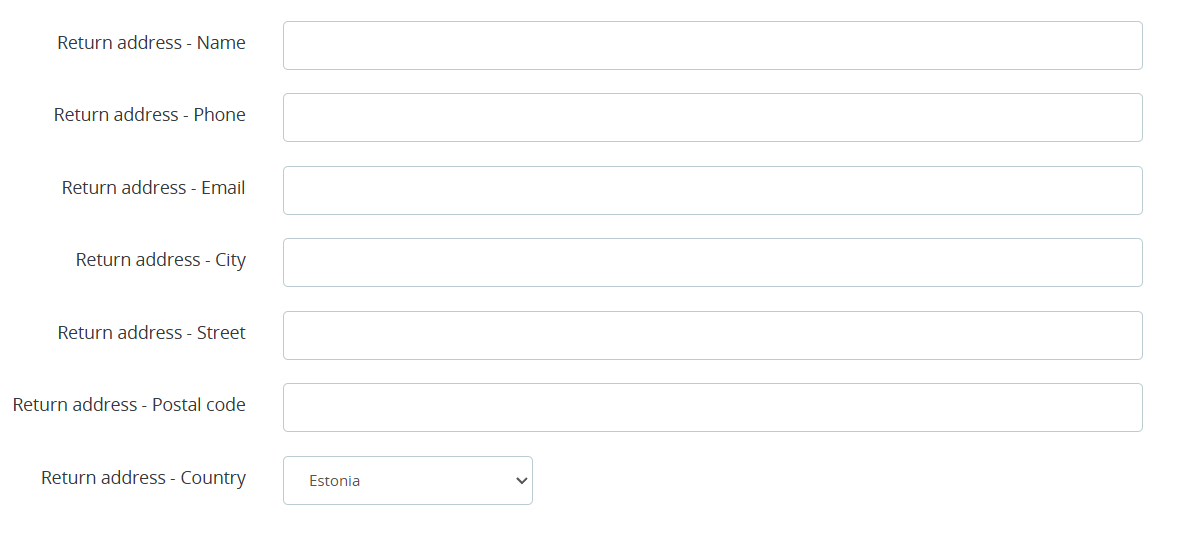
- The delivery provider must be informed of the return address (sender’s address). Note: The sender’s address must include a valid mobile phone number starting with a country code (e.g., +372) and must not contain any spaces.
*If you joined MakeCommerce before 2022, please also check whether the Shipping+ service is active for your online store in the MakeCommerce self-service portal (Settings→ Services).
Printing parcel labels
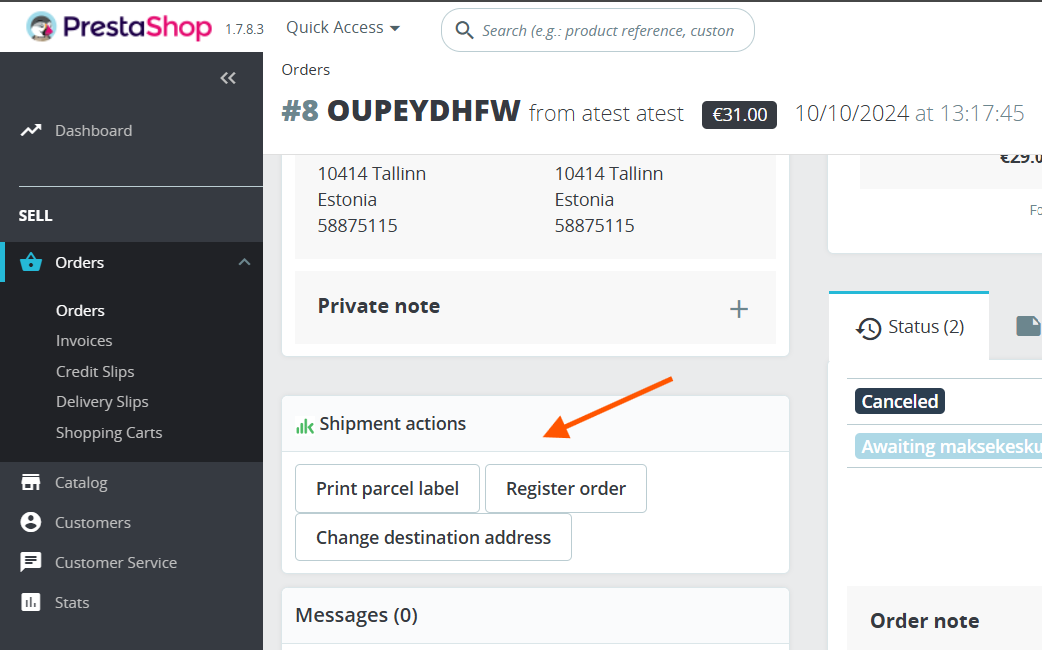
- After the order is paid the shipment is automatically registered through our plugin. In the order view you have several options related to the shipment:
- Print parcel labels
- Track orders
- Change the delivery destination
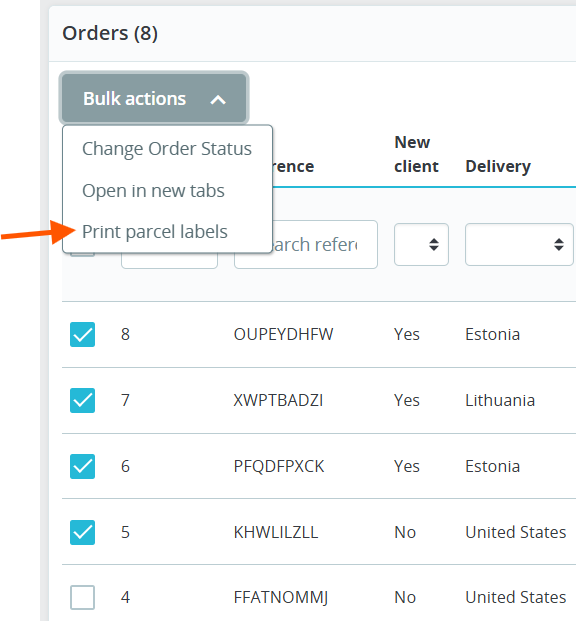
You can also print multiple parcel labels at once by selecting the desired orders and then choosing Print parcel label. A new window will open displaying the labels.
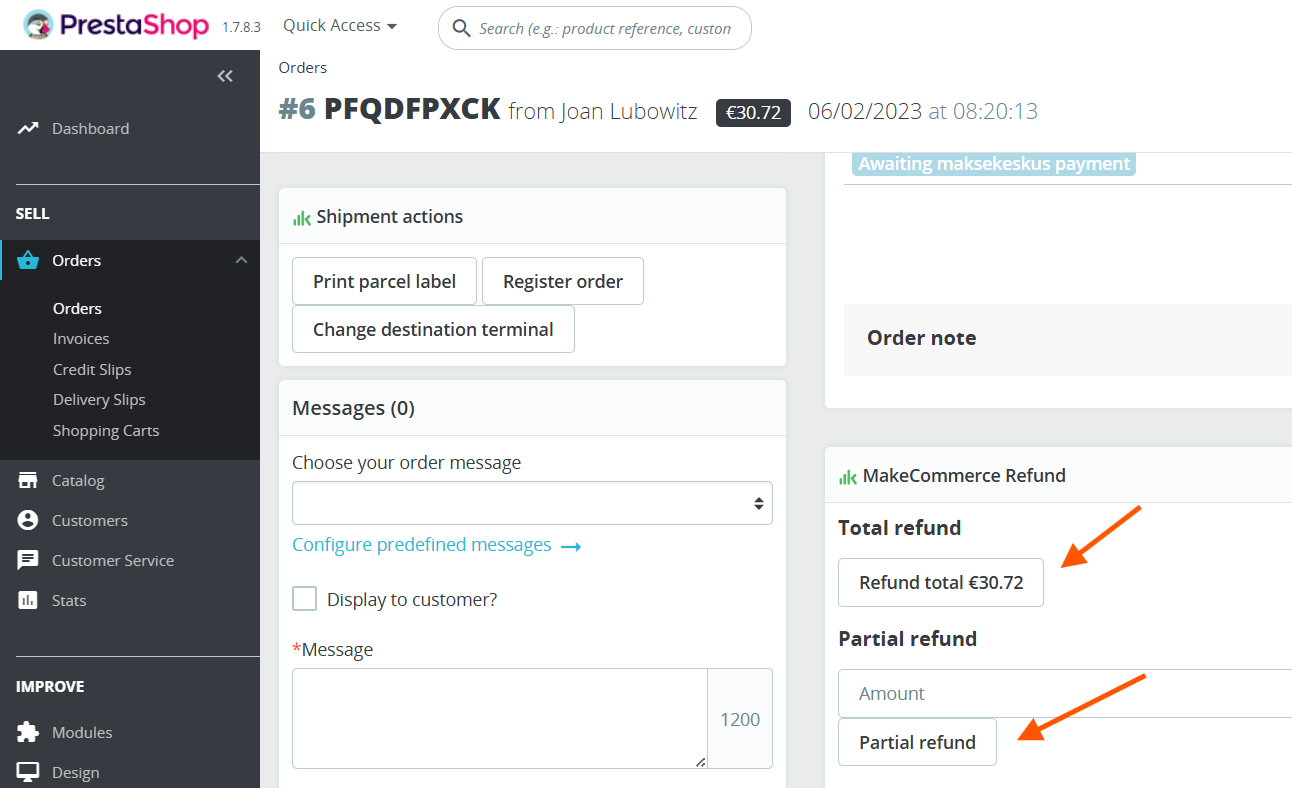
Processing refunds
With the MakeCommerce module, you can issue refunds to customers directly from the order view in PrestaShop. If needed, it is also possible to issue multiple partial refunds.