Bank payments
 Card payments
 Apple Pay
 POS terminals
 Buy now pay later
 Payments & Shipping
 Refunds
 Recurring payments
 Payment link
 Payments for accommodation businesses
 Payments for service businesses
 Donations
 Kniks gift card
MakeCommerce plugin for Shopify
Follow these steps to configure MakeCommerce payment and shipping apps and take advantage of the best e-commerce payment and shipping bundle in the region.
Installation
Setting up shipment integration
Shipping+
Activating Omniva, DPD, and Itella courier method
Guide for a new shipping logic without parcel processing product
The MakeCommerce app allows you to receive payments from Estonian, Latvian, Lithuanian and Finnish banks, from MasterCard and Visa credit and debit cards, from Revolut payments as well as to offer buy now pay later (BNPL) options. MakeCommerce developed Kniks gift cards can also be used to pay for purchases.
With the additional MakeCommerce shipping app, completed purchases can be registered as parcel machine deliveries to Omniva, Itella SmartPost, DPD, and LP Express. In addition, Omniva and DPD courier delivery method is available for all Baltic countries. When using Omniva courier services, merchant can hand over shipments to Omniva parcel machines and courier will deliver the parcel to the customer´s address.
Installation
- Visit https://apps.shopify.com/makecommerce-payment-app and click ‘Add app’.
- You will then be redirected to module installation page, where you click ‘Install app’.
- After that Shopify payments settings page is displayed, click ‘Manage’.
- Next you will be presented with the view where you can configure MakeCommerce API credentials. To do that first click ‘Enable payment provider for shop’.
- After inserting the credentials (which can be found in the MakeCommerve self-service environment) press ‘Save’. In order to test the integration you should also provide test credentials.
- Now you should click the ‘Shopify internal payment settings’ link and choose which logos you want to display in checkout. Please note, that these are not individual links to banks but an illustration. The actual payment method will be chosen in the MakeCommerce gateway.
- If in the ‘Test mode’ section ‘Enable test mode’ is active, then test credential will be used. If this selection is not made, then live credentials are used.
If your shop used the old MakeCommerce module, then now you can deactivate it. Go to https://YOURSHOPURL.myshopify.com/admin/settings/payments/alternative-providers/1052878 (where YOURSHOPURL should be replace with your shop actual URL) and choose ‘Deactive MakeCommerce’. Now you can activate the new app from Shopify admin > Settings > Payments > Manage and choose ‘Activate’.
Attention, if you’ve used MakeCommerce app to register shipments, then you need to install dedicated MakeCommerce Shipping app in order to continue doing so. Please follow the guides to set it up.
Here’s the screen recording of setting up the payment app.
Setting up shipment integration
MakeCommerce Shipping integration is a separate app that can be installed here. The shipping selection will be shown in the cart view and you have to make sure that all of your customers will always go through the cart to the checkout, otherwise they will not see the shipping options.
MakeCommerce Shipping App creates a free product named ‘Parcel processing’ which has 22 variants with different weights. Those weights determine which shipping method Shopify shows in the checkout shipping step. Variant weight ranges are 1000-1500kg. 2000-2500kg. up to 22000-22500kg. This means, that the products in the cart have to be in 0-500kg range combined.
We have created a universal solution which has been successfully tested with most used Shopify themes. However, if you are using a less commonly used theme and there appears to be issues, please get in touch with our customer support and we will help you to find the solution.
For best experience we suggest you use cart page instead of a cart drawer.
The shipping app can be installed by visiting the link https://apps.shopify.com/makecommerce-shipping-solution and hitting the ‘Add app’ button.
In the next view you’re able to install the app by pressing the ‘Install app’ button.
Step 1
First remove the “Buy now” and “Checkout” buttons. This is required, because the checkout should always go through shopping cart, because this is where the parcel machine list is displayed.
- If your shops hasn’t any products yet then add one. You can read more about adding products from here.
- Go to shop admin view.
- From left choose Online Store -> Themes -> Current theme -> Customize
- Go to product view and choose any product
- Look for “Show dynamic checkout button” and make sure it’s turned off
- The process can be seen in the video below. The views might slightly change depending on the theme. You can also refer to Shopify’s own guide on how to remove checkout button (official Shopify manual).
- Note, that if you change the theme at any point, you need to redo this step.
Step 2
In order to send parcels to parcel machine you need to obtain customers phone number.
- Go to shop admin view.
- From the left choose Settings and then Checkout
- Make sure, that the customer contact method is e-mail (Customer contact method = Email)
- Then make the phone number mandatory (Shipping address phone number = Required)
Step 3
After installing MakeCommerce shipping a product named ‘Parcel processing’ was added to the shop. This is required to generate parcel delivery and therefore should not be deleted. If you have accidentally deleted it, contact our support.
The product will be shown in the checkout if customer has chosen parcel machine delivery. You can change the name of the product to better suit your shop. However do not change the variations of the product.
Step 4
Since ‘Parcel processing’ isn’t a real product that customers should be able to buy, then it should be hidden from product views, but not deleted. To achieve this you’ll need to create a new collection titled ‘All’ and add all but ‘Parcel processing’ to that collection.
- Go to shop admin view.
- From left choose Products -> Collections -> Create collection
- Name the collection All
- Choose Automated for collection type.
- Add a condition Product vendor -> is not equal to -> mk
- This will automatically add all products except Parcel processing.
- If your shop offers suggestions of other products to purchase then you need to control that manually to exclude the Parcel processing product.
Step 5
You should also make sure that Parcel processing doesn’t show up in search results.
- Go to shop admin view
- From left choose Products -> Collections -> Create collection
- The collection name can be anything you want
- Collection type is automated
- Add condition Product vendor -> is equal to -> mk
- Collection availability should be “none”
- Only add Parcel processing to this collection
Step 6
Now, go to ‘Shipping Methods’ inside this app upper menu and follow the instructions there. You will need to create a shipping zone in your Shopify shipping settings for countries that you wish to ship to. If you ship world wide, you can create one shipping zone only. Add entries there according to the login explained in the ‘Shipping Methods’ tab in the upper menu.
Step 7
By default Parcel processing has a Free or 0.00 price. However this doesn’t mean, that shipping is free. Because of that we advise to change the Shopify theme and remove Parcel processing pricing from checkout view.
- Go to shop admin view
- Freom left choose Online Store -> Themes -> Current theme -> Actions -> Edit languages
- Search form term Free and find a field Free total label (please note that this could vary between different themes)
- Replace Free with a stroke of space (empty character) in order to avoid price being shown. Make sure you use a space bar as the field can not be empty. Please look at the video on how to do this:
Step 8
Go to ‘General settings’ view from the module main menu and make sure MakeCommerce live or test credentials are inserted. If both are there, then the live credentials are used to display parcel machine list. If only test credentials are inserted then those will be used. Parcel machine list is displayed in the checkout page where customer is able to choose their preferred parcel machine to pick up the purchase.
Step 9
MakeCommerce Shipments can be tested in live-shop using one so called test product. In this case, parcel machine list will only be displayed when the test product is being added to cart. For all the others, delivery options will not be displayed.
To do that go to ‘Snippet settings’ view in the MakeCommerce module top menu and choose ‘Test mode enabled’ and make sure, that the ‘Snippet enabled’ is also active.
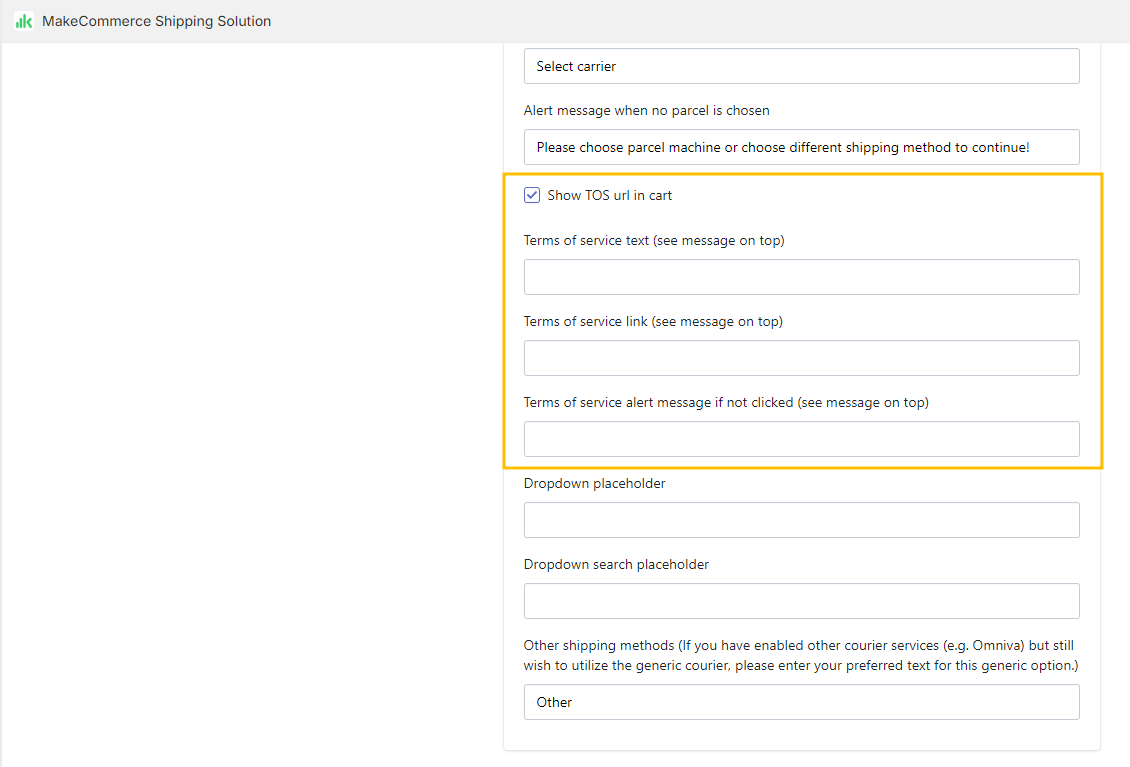
In the ‘Snippet settings’ view you can edit messages and make accepting of terms and conditions mandatory in order to make the purchase. To do this, fill in the confirmation box (Show TOS in cart) and add the nessecary text and the URL link to the Terms of Sale in the following lines.
Step 10
This app is meant to be used along side MakeCommerce payment app. You can test this with the old MakeCommerce module as well, but make sure that the shipping app is in test mode, as described in the previous step. If you start to use the new payment app, then you might need to configure the shipping app again.
Step 11
This app offers two Theme App Embed blocks. You need to enable MakeCommerce Shipping for parcel machine locations to be shown in cart view.
- MakeCommerce Shipping – enables parcel machine selection in the cart view
- MK Hide Modal Buy Now – hides “Buy now”/”Checkout” button from “Add to cart” modal and adds 1 second delay to “Buy now”/”Checkout” in the cart view.
- Go to your shops admin page
- To preview MK Hide Modal Buy Now go to link MK Hide Modal Buy Now Preview (the link is generated inside the app) and click on Add to cart, the modal will not show “Check out” anymore and will only show “View my cart”. If you toggle it back off, it will start showing again. Now when you go to View my cart you will see that Checkout button loads with a delay. If you want this enabled then also “Save”
- To preview MakeCommerce shipping then you have to have completed previous all previous steps for it to show. Under app settings “Snippet settings” the “Snippet enabled” option must be enabled and under “Shipping methods” at least one option must be enabled. Under General settings at least one of the credentials must be provided!
Now, go to link MakeCommerce Shipping Preview and click on Add to cart and then head to the Cart view. It will now show you the parcel machine selection if it’s enabled and all the past steps are completed.
IMPORTANT: If you have Test mode enabled under Snippet settings and Test product id is provided then you have to add that product to cart for it to show.If you are happy with it then Save - If you wish to see those settings without those links then in shop admin view from left choose Online store -> Themes -> Current theme -> Customize -> Theme settings (bottom left) -> App embeds (top right)
Step 12
If you want to add other delivery methods besides parcel machines, then they generally do not have integration with this app. The exceptions are Omniva, DPD, and Itella couriers for which you can find the guide here: Activating Omniva, DPD and Itella courier method
For adding other methods we have two buttons that are found under snippet settings. Those buttons will skip our integration flow and will go with the Shopify normal flow. All the other methods other than parcel machines create a 0-500kg rule. If one of those other buttons other is used then it will show all the 0-500kg rules in Shopify shipping. More info under ‘Shipping methods’ in the top menu.
Step 13
If you want to send parcel machine deliveries to different countries, then you need to configure each market in the Shopify view.
- If you send products to one country, there is no need to make changes
- Go to shop admin view
- From left choose Settings -> Markets
- There you’ll see the Primary market – this is the market where you send products.
- If you wish to create a list for other countries, then you need to create a new market and configure it accordingly. Please refer to this video on how to do this.
Complete video of shipping app configuration
You can view the entire guide of shipping app configuration from first step to the last in this video.
Shipping App Update
Since February 13th 2023, our updated delivery module allows you to automatically confirm orders and send a package tracking link in an e-mail. Please see instructions below on how to start using the new feature.
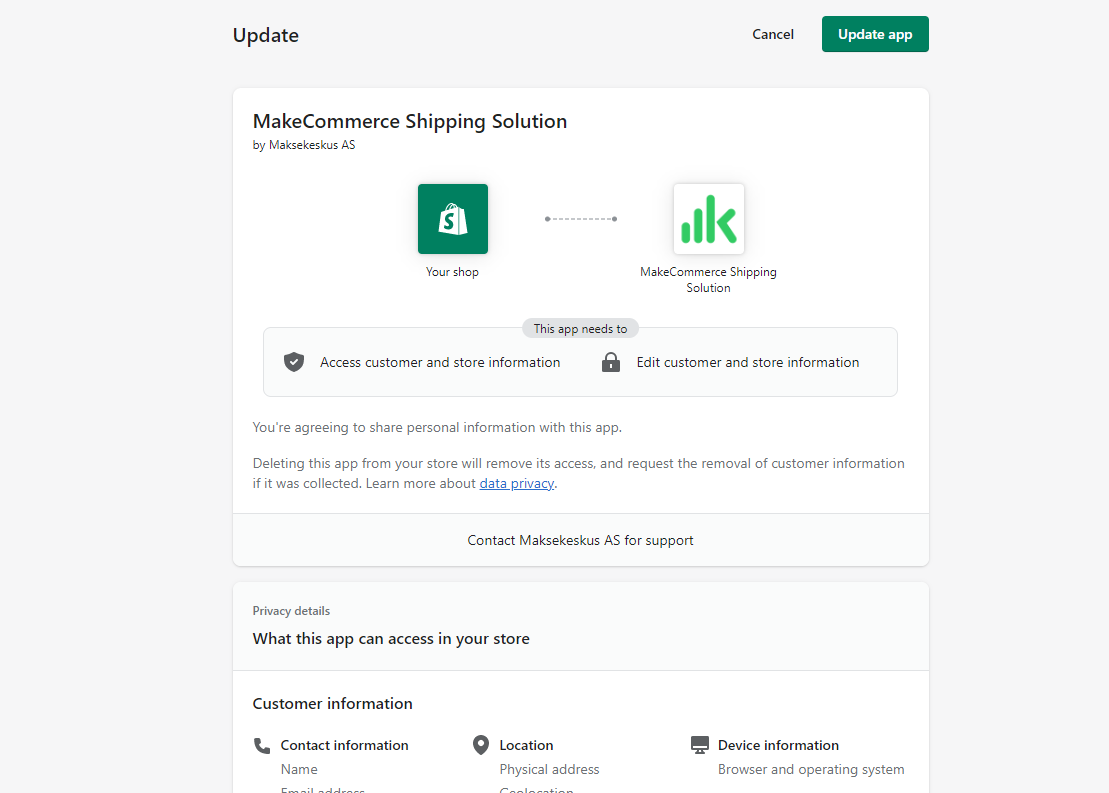
Open the MakeCommerce shipping module (app). Shopify first asks to update the app (see image 1). This is necessary because the updated solution needs more permissions to function.
If you see a blank page instead, your store may have been moved to the new Shopify link (URL) https://admin.shopify.com/ and your browser does not yet support redirects related to this link.
You must enable redirects from the link https://admin.shopify.com. (See picture 2).
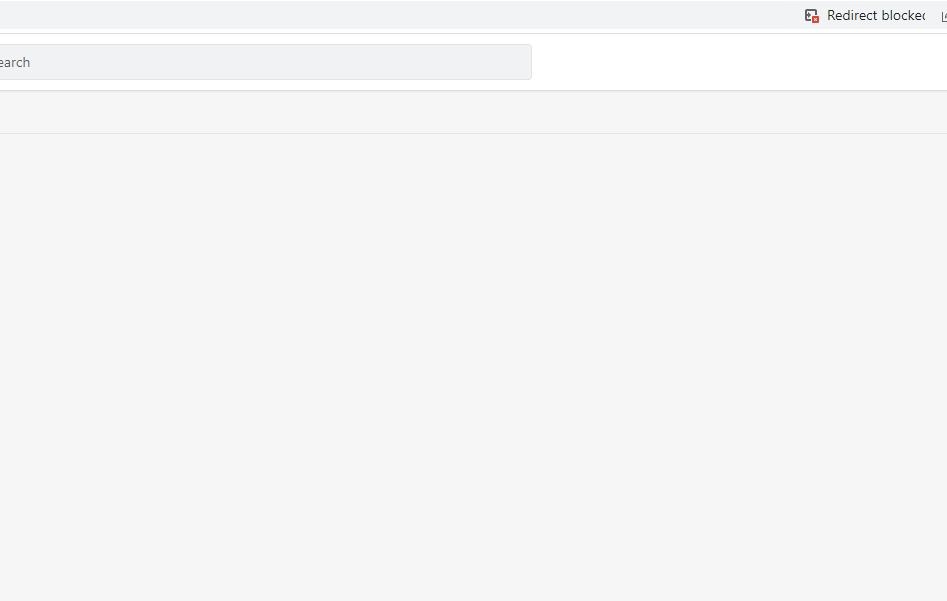
If your Shopify admin URL is https://myshop.myshopify.com, you don’t need to do the above action.
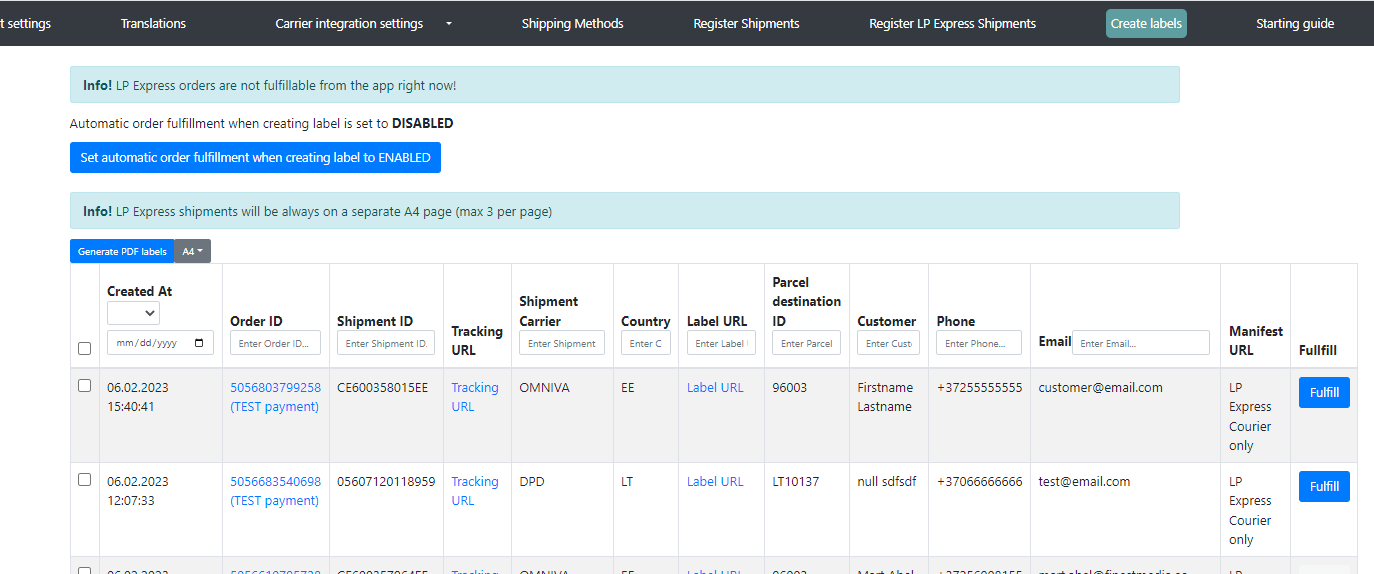
The new order fulfilment function can be used for purchases done after the module has been updated. For orders made before the module update, the “Fulfill” button is not available. The same applies to orders that have already been completed. (See picture 3).
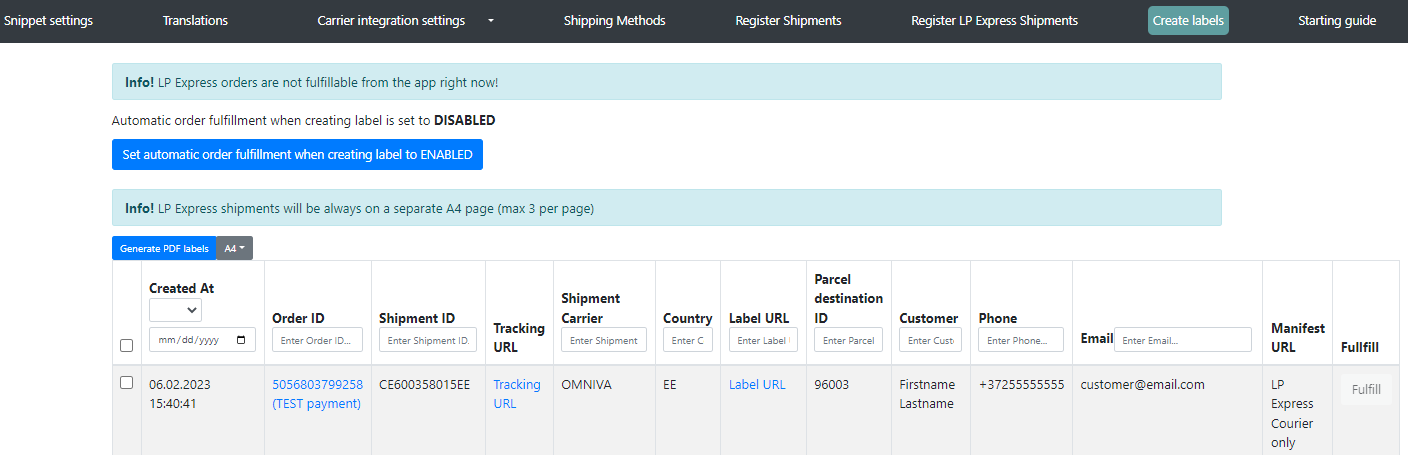
Orders can be fulfilled in two ways. By pressing the “Fulfill” button each time or by activating the “Automatic order fulfilment when creating label” function. If this function is enabled, the order will be set to fulfilled automatically when the package label is created. For example, if you create 5 labels at once and these will automatically be set to fulfilled. (See picture 4).
When fulfilment is triggered, the Shopify order is assigned a status of “Fulfilled” and sent to the “Archived” section. At that moment, an automatic e-mail is sent to the customer that his goods are on their way. A link to track the shipment is also attached to the confirmation letter.
Shipping+
In Estonia and Latvia we offer a solution that allows you to send packages to Omniva and DPD parcel machines without having to sign a business client contract with the carriers. Shipping costs are automatically calculated from the store’s MakeCommerce account. You can find the service price in the price list, returns are subject to the same pricing. The prices for delivery via MakeCommerce are not dependent on package size.
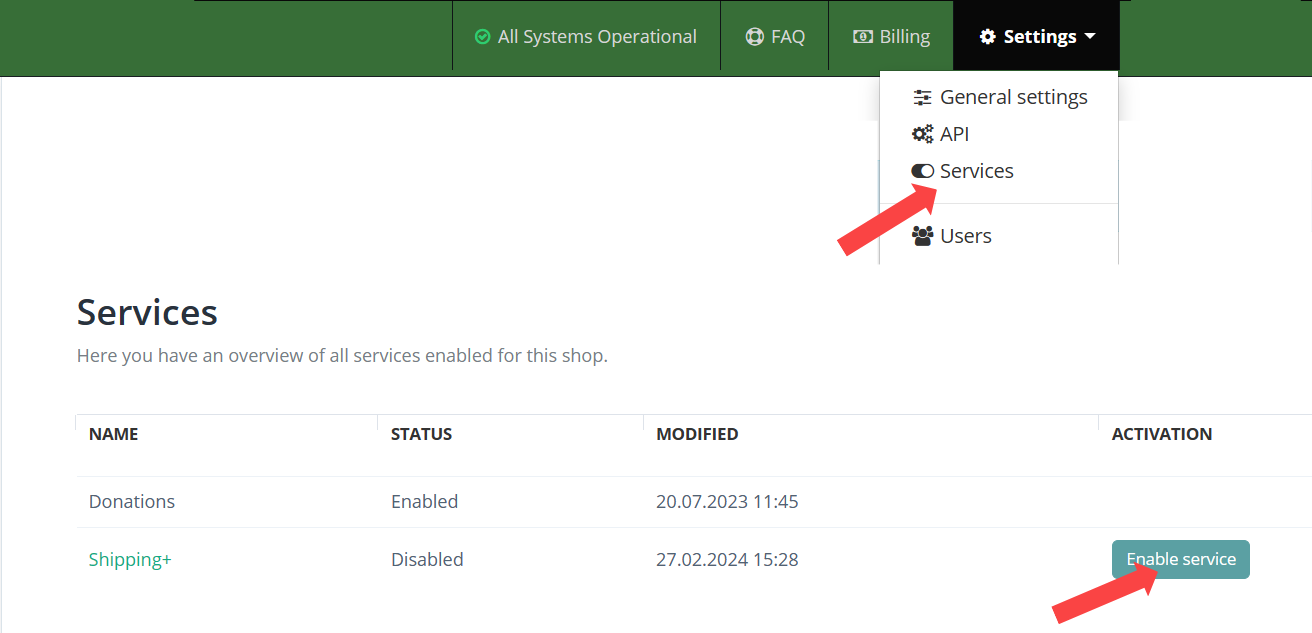
Service activation
The merchant must have a valid service contract with Maksekeskus/Makecommerce and use our Shopify shipping app.
In the MakeCommerce self-service portal click Settings -> Services to find out whether the Shipping+ terms have been accepted. If they have not, then read the terms and click “Enable service”.
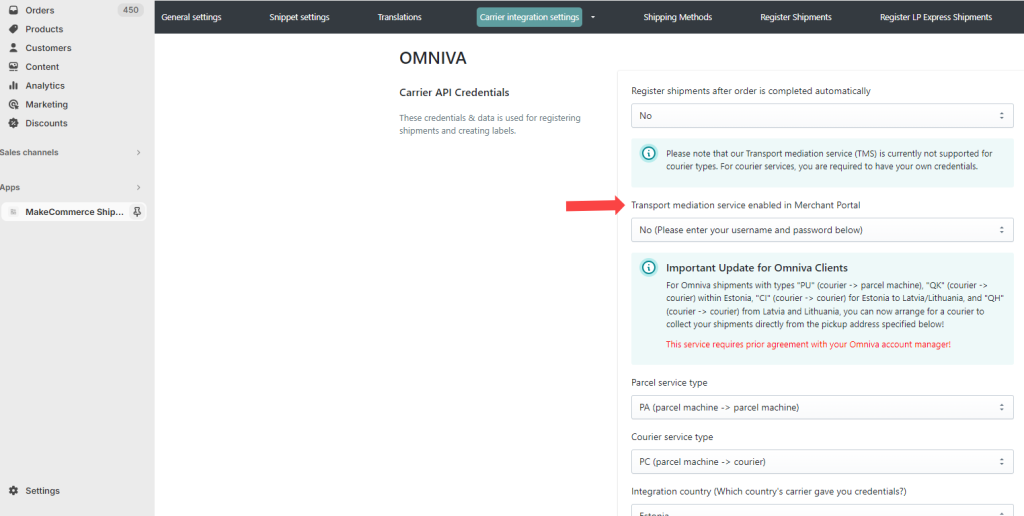
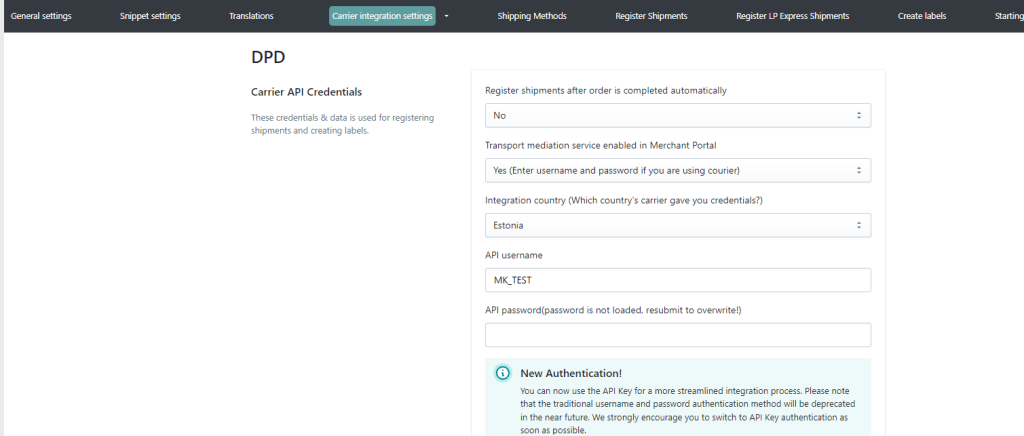
The last step is to configure for DPD and/or Omniva “I use the contract through MakeCommerce” (Transport mediation service) in the admin panel of your e-shop.
Activating Omniva, DPD, and Itella courier method
Shopify Omniva and DPD courier is available for sending packages in Estonia, Latvia and Lithuania. Itella courier is available for use in Estonia and Finland.
Existing merchants that have installed the app before this:
• Open Shopify shipping app in shop’s admin panel and proceed to „Shipping methods“ inside MakeCommerce shipping app. This will create new courier methods. It will also create new Parcel processing product variants with correct weights.
For new merchants that have not installed the app before:
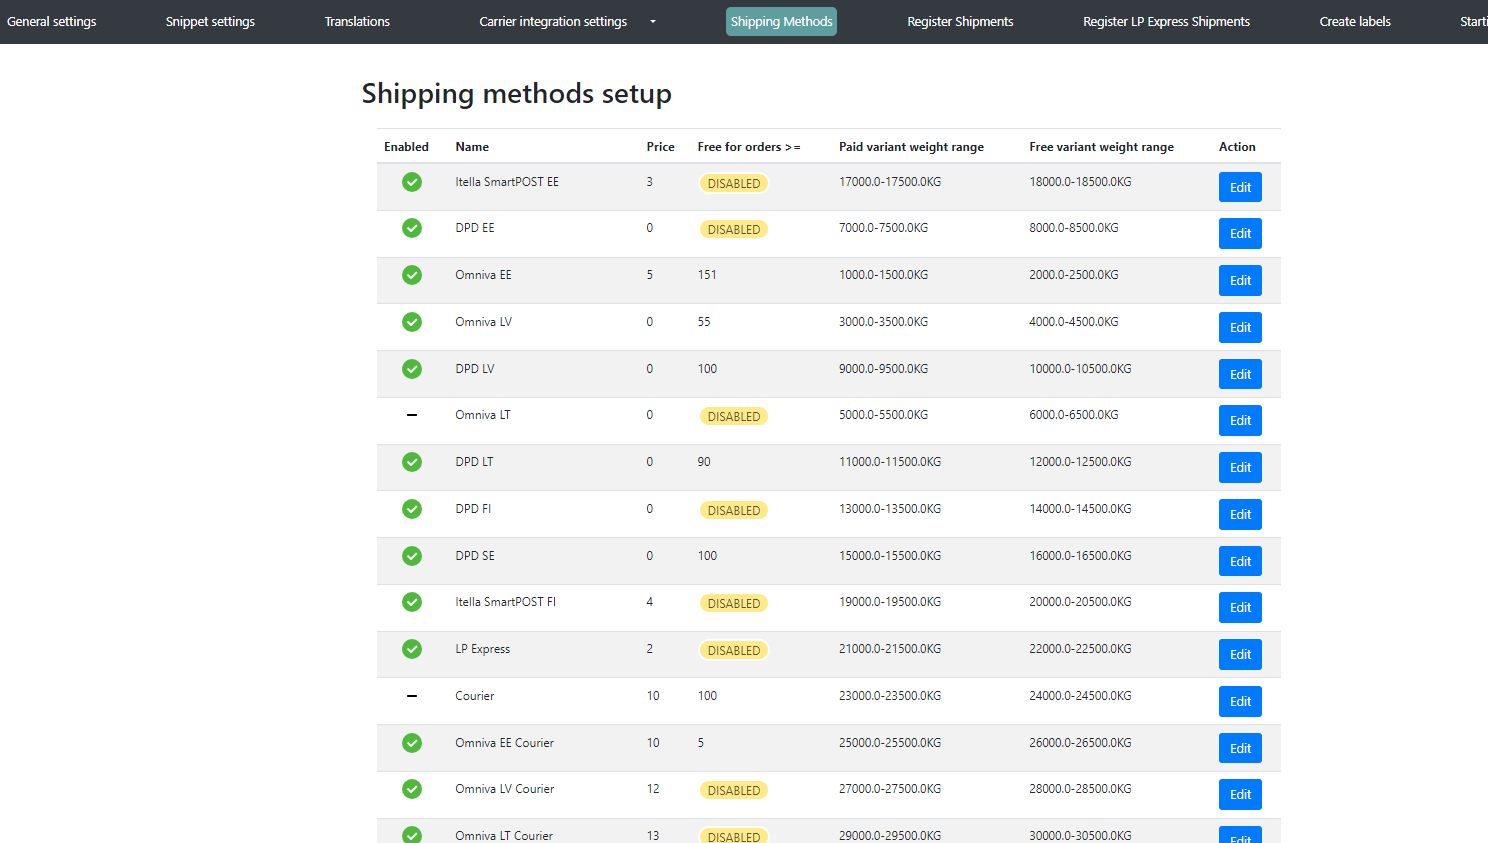
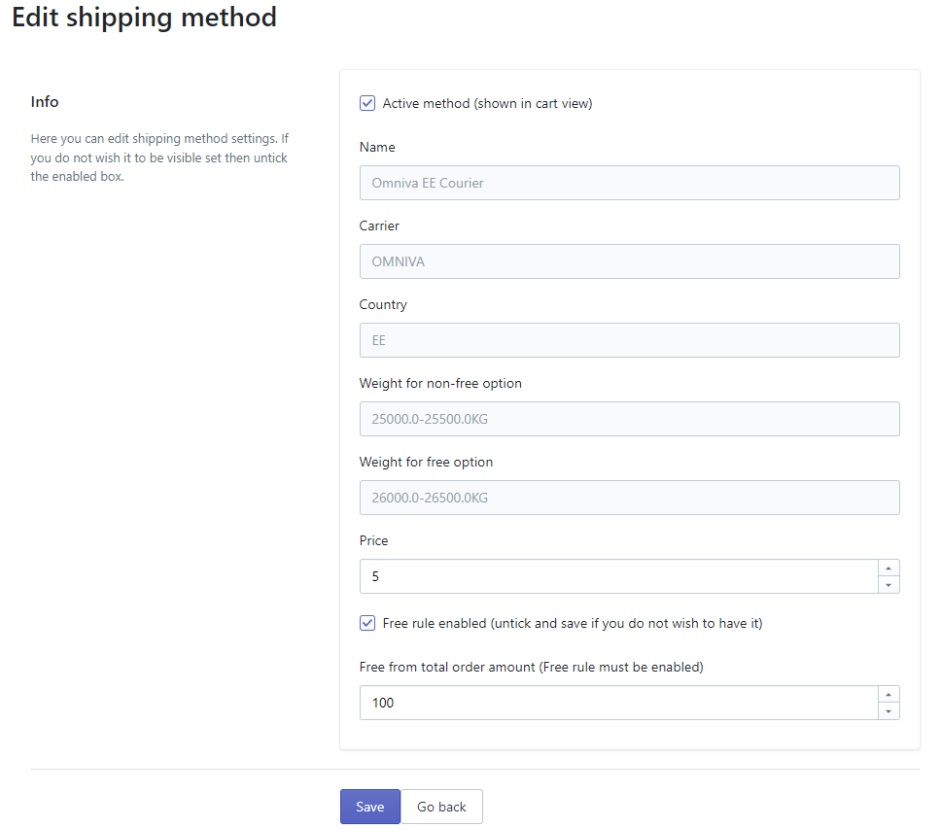
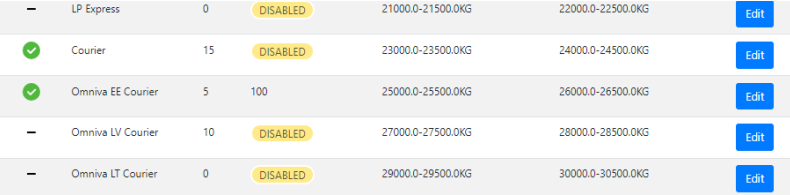
• New methods will appear in this list, these can be configured by pressing edit button.
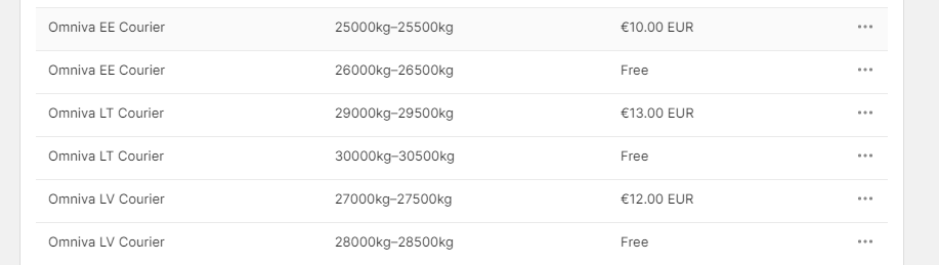
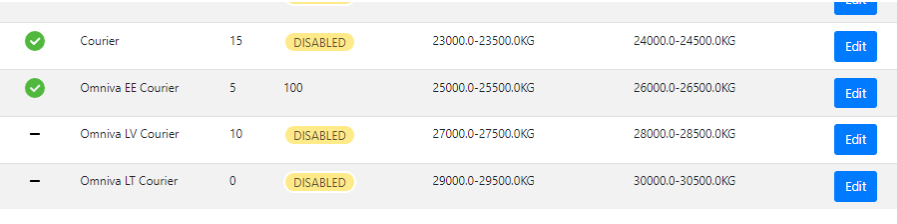
• Make sure that after enabling these new methods that the Shopify own shipping rules are configured for it as well like described in Step 6. Example of configured courier methods inside Shopify’s own shipping settings.
Examples:
Omniva EE and LV courier is enabled.
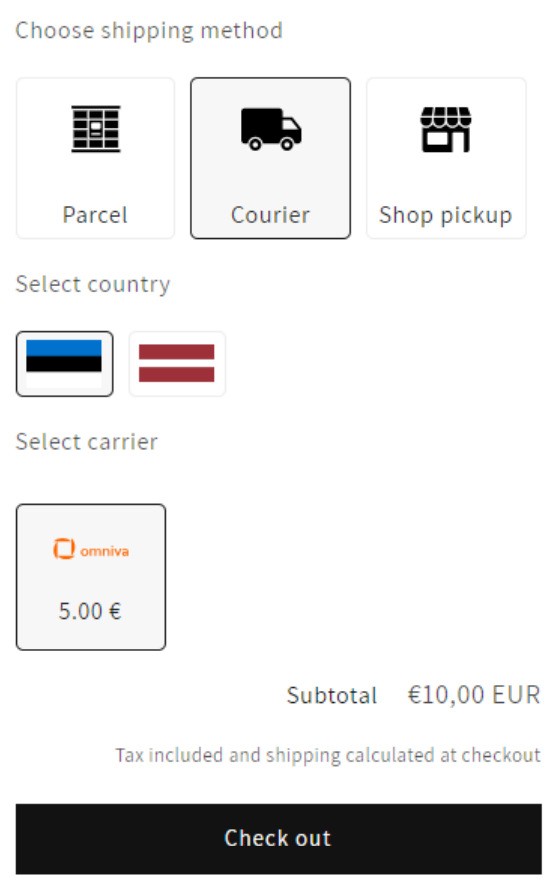
If Omniva or Itella courier is enabled for one country only -> no flag is shown then.
Courier method enabled + 1 Omniva Courier method enabled.
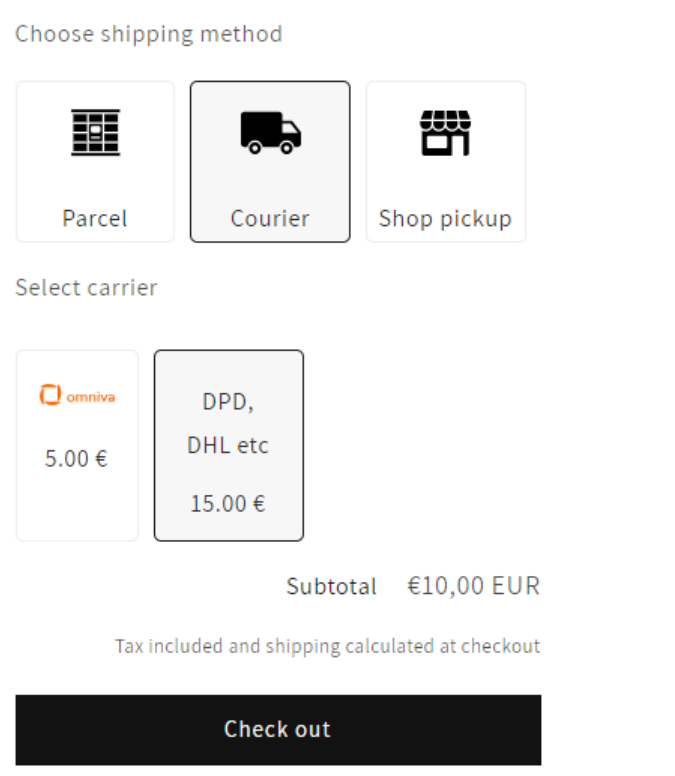
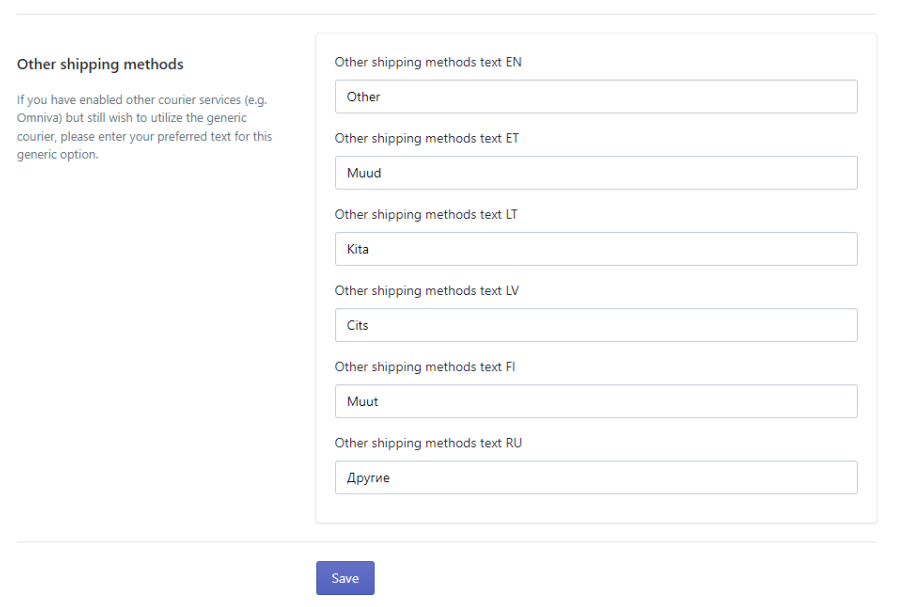
This text „DPD, DHL etc“ is configurable text under „Snippet settings“.
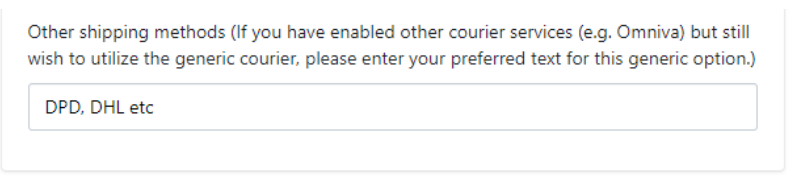
NB! By default there are values „Other“ in multiple languages.
Also that field can be translated in „Translations“ tab „Other shipping methods“.
Other things worth mentioning
• Under „Snippet settings“ -> „Courier choice enabled (just a logo, goes to normal shopify flow)“ should be enabled for courier choice to show up in cart. If only that is enabled and no courier methods under „Shipping methods“ then it will go for the 0-500kg flow.
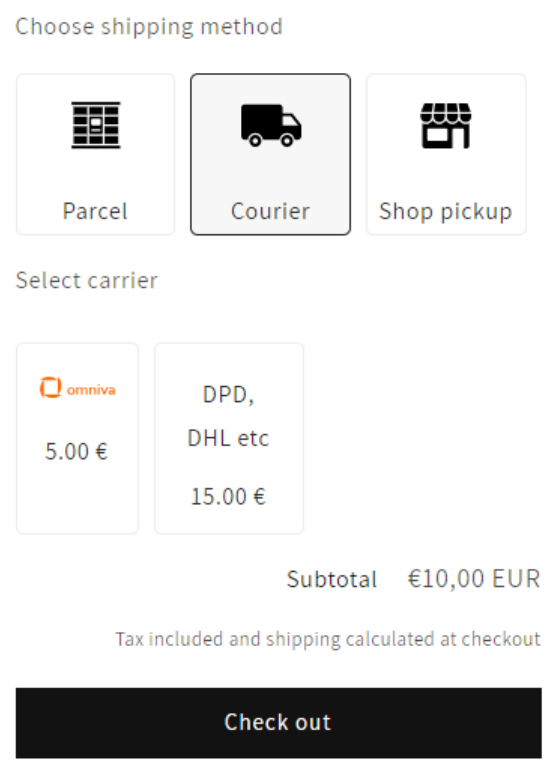
• If all from previous point plus only „Courier“ is enabled in the „Shipping methods“ then it will go for the 23000kg-23500kg or 24000-24000kg flow depending if free shipping rule is turned on or not. It will show up under cart like this and the text is configurable under „Snippet settings“ ->„Courier choice text“.
• When now additonally Omniva courier is enabled from „Shipping methods“ the choice in cart will look like this.
Guide for a new shipping logic without parcel processing product
Our newest delivery selection process provides the same high quality of service, but it’s now simplified without the need to add an additional item to the customer’s cart. This makes the process more intuitive for your customers and eliminates the need to configure weights for shipping rates.
To use this new approach to delivery selection, you’ll need to create a “Delivery Customization”. Here’s how to do it:
Create a “Delivery Customization”:
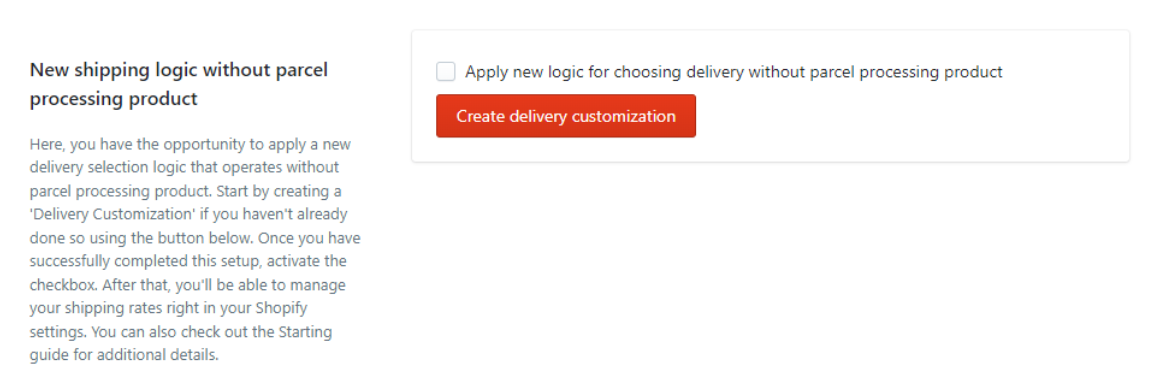
- Navigate to the “Snippet settings” tab, “New shipping logic without parcel processing product” section.
- Click on “Create delivery customization” button.
- After you create it, your customization should appear in the Shopify settings at: Settings -> Shipping and Delivery -> Delivery Customizations. This link will take you directly to the “Delivery Customizations” section.
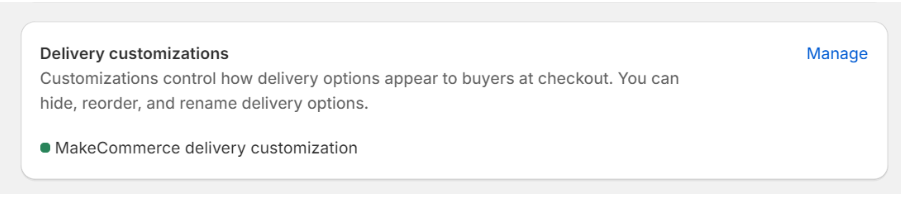
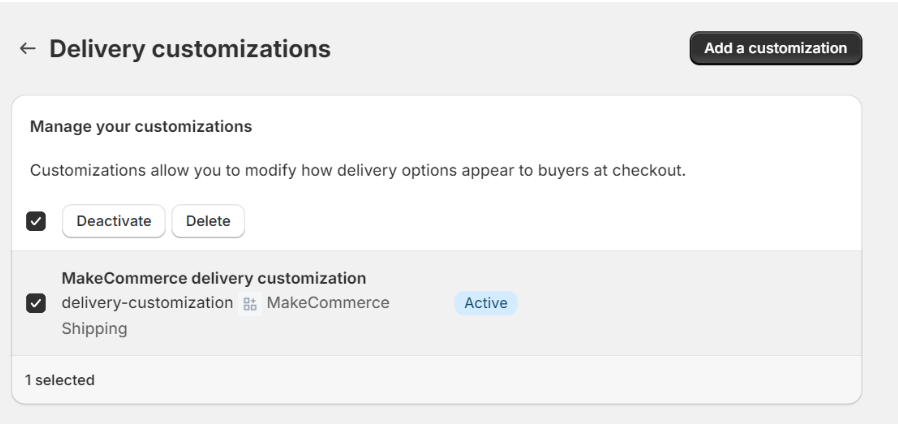
- When you click on the Manage button, you can delete, activate and deactivate it there.
- Activate the feature: After successfully setting up the delivery customization, enable the feature by selecting the checkbox “Apply new logic for choosing delivery without parcel processing product” in the settings. This action applies the new shipping logic across your store.
- Click “Save” to update the “Snippet settings”.
Setup the shipping rates:
- Now you don’t need to specify the weight of the product when setting shipping rates.
- You need to add all enabled shipping methods to Shopify shipping rates.
- The name of the shipping rate in Shopify must be exactly the same as in our application. If you want to modify it, you can do it by editing the shipping method custom name.
For those who are already using the weight version:
- You need to сreate a “Delivery Customization” as described above.
- Then you have to remove the weight conditions from all shipping rates.
- The name of the shipping rate in Shopify must be exactly the same as in our application.
- If you have the normal courier option (not a carrier), you need to make sure that the courier option in our app is also enabled.
Example:
- Step 1. Enable Omniva shipping option in Shipping Methods.
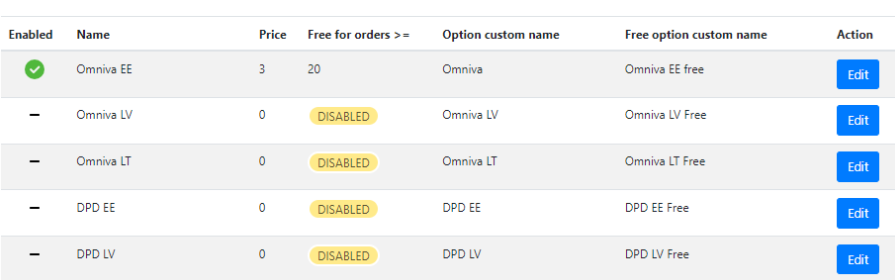
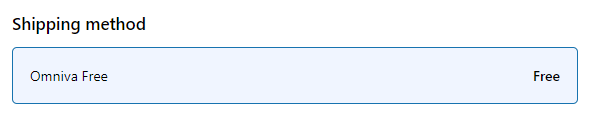
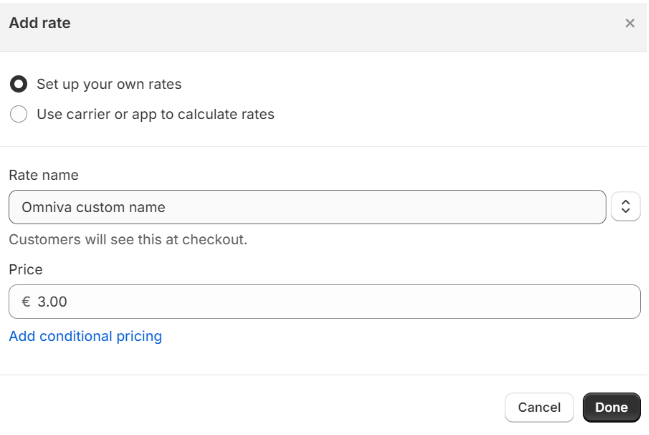
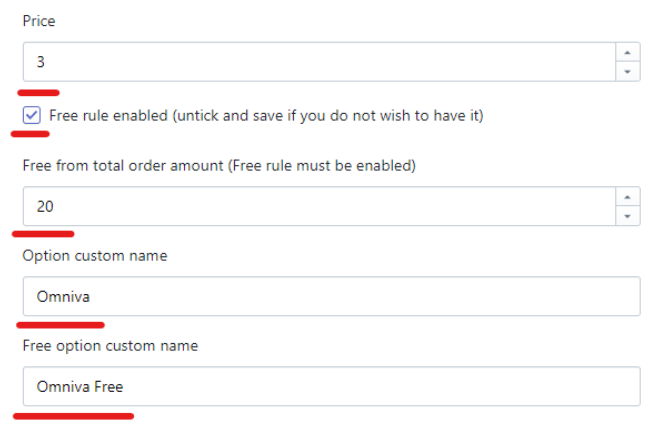
- Step 2. For this example, we will set the Price to 3 Euro, Free shipping from 20 Euro, Option custom name – “Omniva”, Free option custom name – “Omniva Free”.
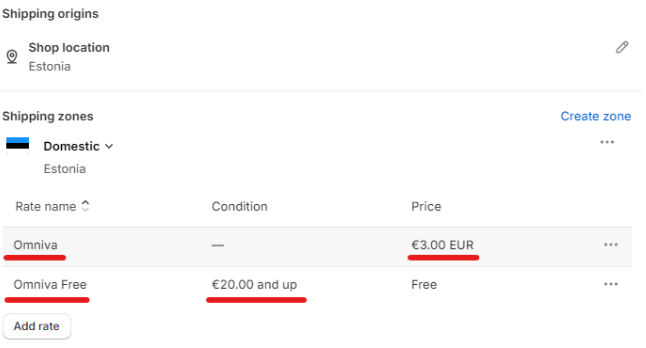
- Step 3. Now we have to set up shipping rates in Settings -> Shipping and delivery -> General shipping rates. All parameters must be identical to those we have specified in the previous step.
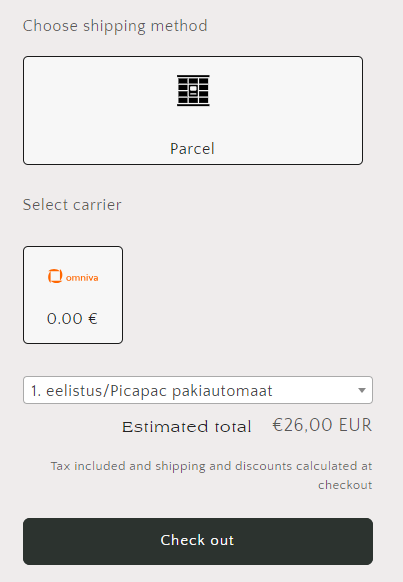
- Cart page for Omniva:
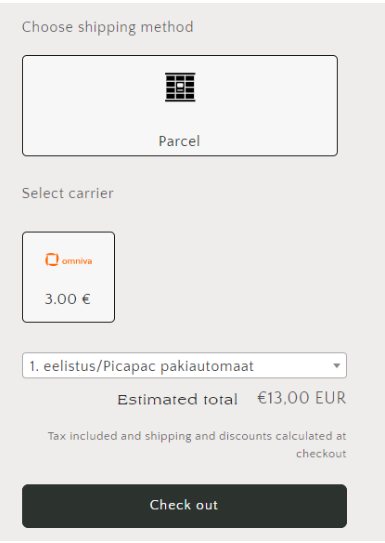
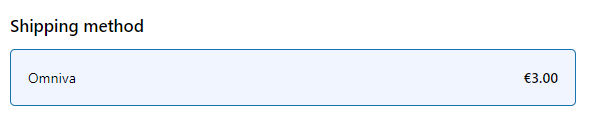
- Checkout page for Omniva:
- Cart page for Omniva Free:
- Checkout page for Omniva Free