 Bank payments
 Card payments
 Apple Pay / Google Pay
 POS terminals
 Buy Now, Pay Later
 Shipping+ and Shipping+ Pro
 Refunds
 Recurring payments
 Payment link
 Donations
 Kniks gift card
 Merchant financing
 Payments for accommodation businesses
 Payments for service businesses
Plugin for Shopify
Add payment methods to your Shopify store in less than 30 min!
Popular bank and card payments, pay later solutions and the option to pay with Kniks gift card.
Plus shipping integration with Omniva, SmartPosti and DPD.
The MakeCommerce app allows you to receive payments from Estonian, Latvian, Lithuanian and Finnish banks, from MasterCard and Visa credit and debit cards, from Revolut and N26 payments as well as to offer buy now pay later (BNPL) options. MakeCommerce developed Kniks gift cards can also be used to pay for purchases.
With the additional MakeCommerce shipping app, completed purchases can be registered as parcel machine or courier deliveries to Omniva, SmartPosti, DPD, and LP Express.
Below is the guide how to quickly upgrade your shop:
- How to add MakeCommerce payments to your e-shop?
- How to set up MakeCommerce shipping to your e-shop?
If you are not yet a customer but would like to use our Shopify solution, please fill in the application form.
How to add MakeCommerce bank payments, card payments, and pay later (BNPL) options to the e-shop?
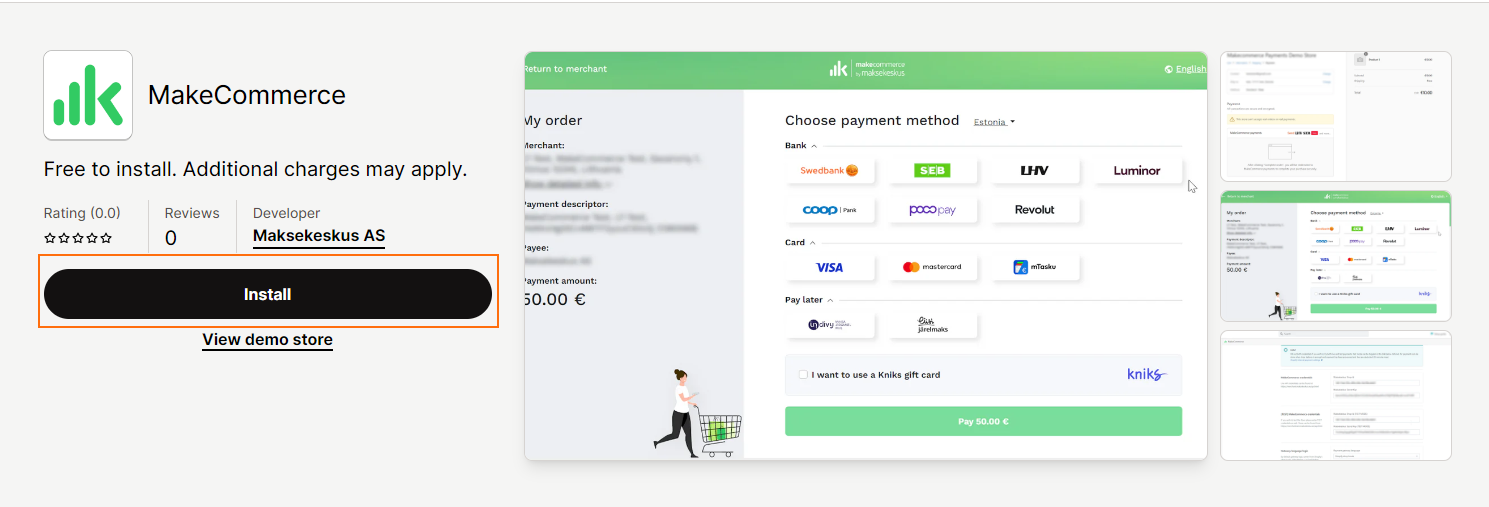
- To install the app click the button Open.
- Next, you will be taken to the app installation page, where you can click Install.
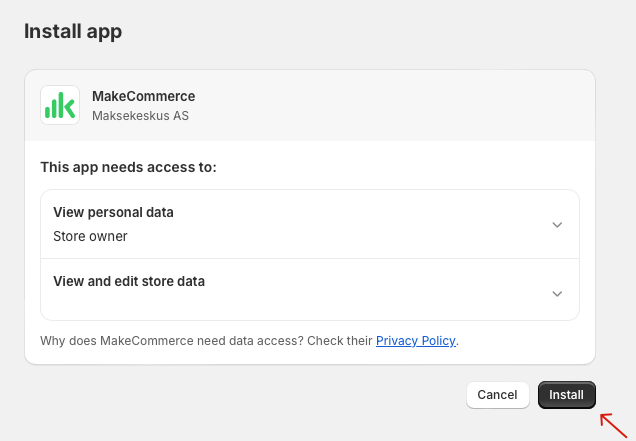
- You will then be taken to the Shopify e-shop payment settings page. Click Install.
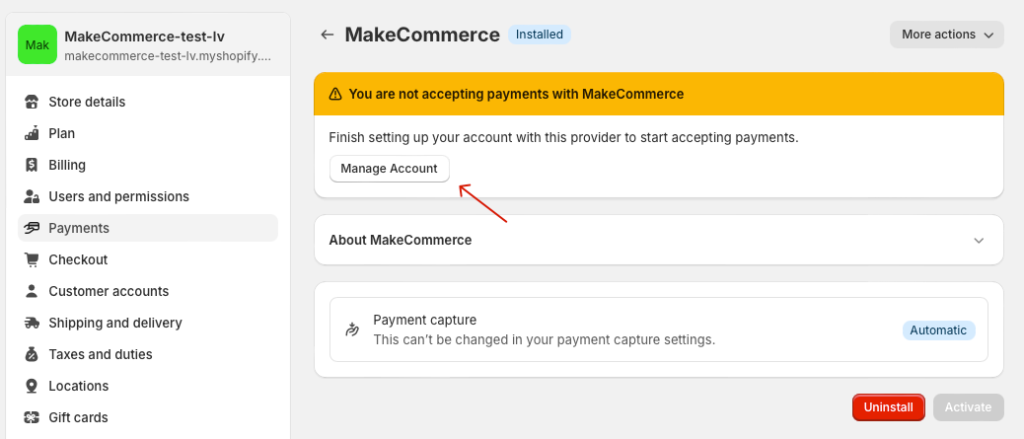
- After installing the app, you will be taken to the Shopify payment settings, where you need to click on the Manage Account.
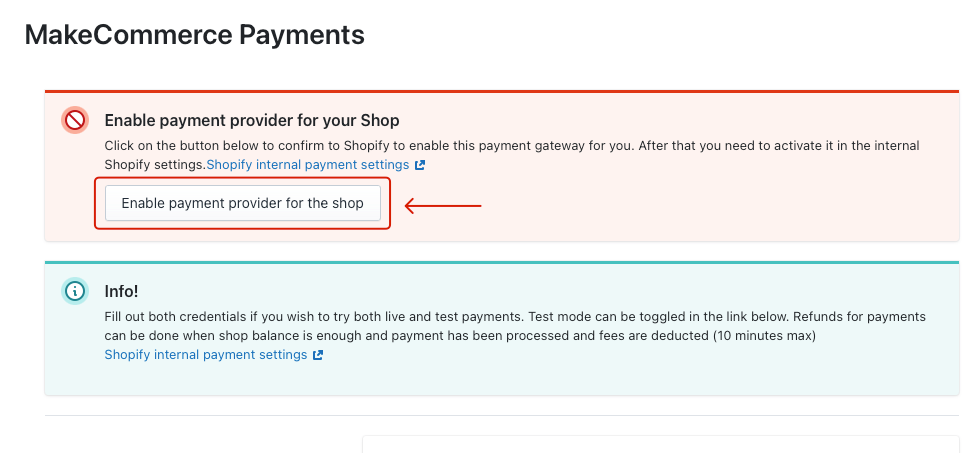
- Next, you will be taken to the application view, where you need to enter your MakeCommerce API credentials. To do this, you first need to click Enable payment provider for the shop.
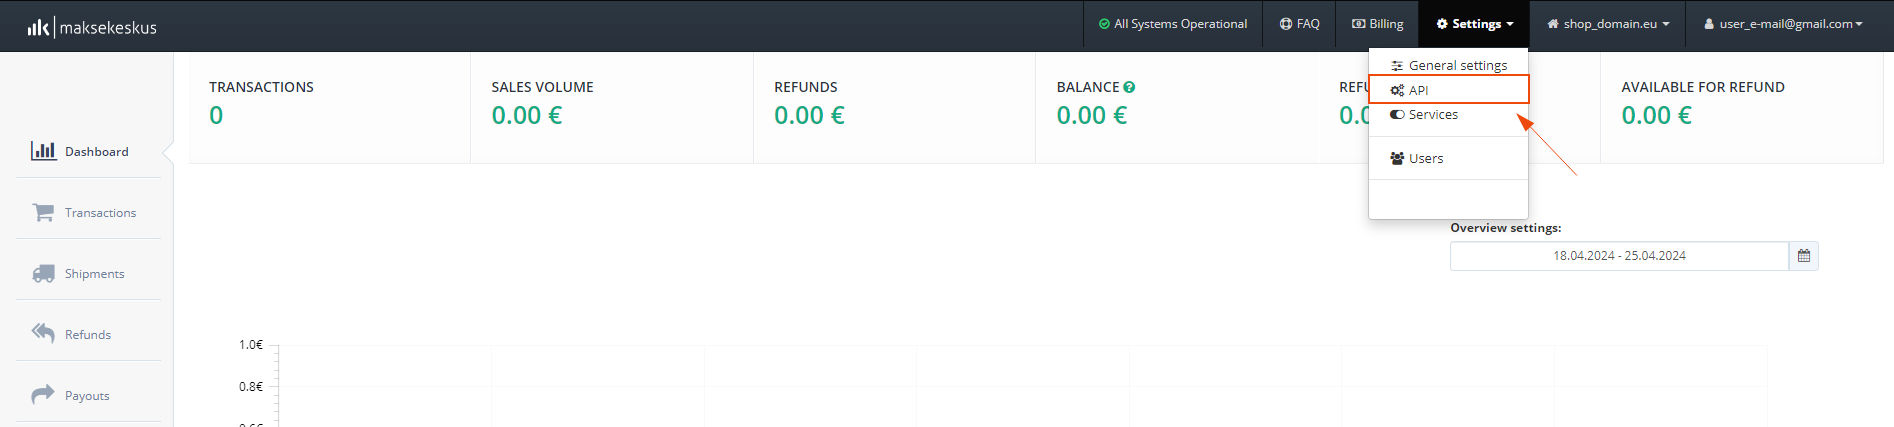
- API keys are required to activate test or live payments. You can find them in Merchant Portal under Settings > API.
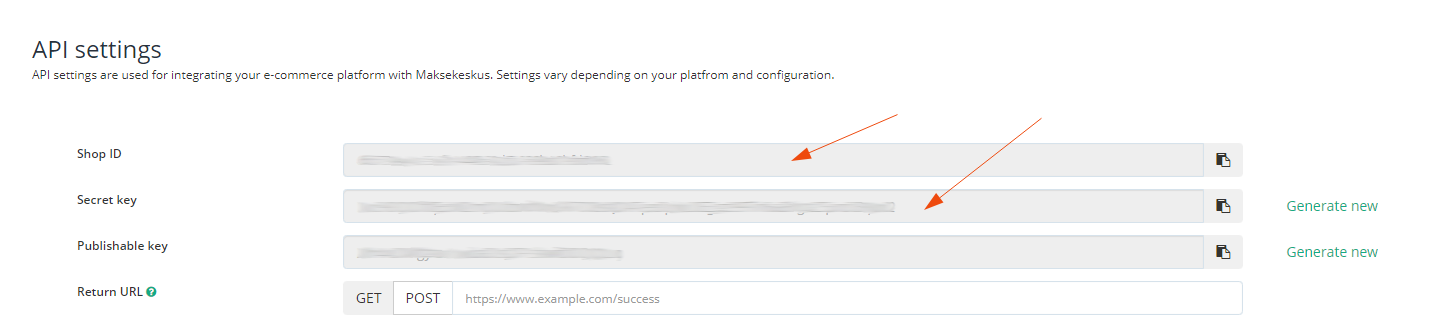
You need to copy the Shop ID and Secret key:
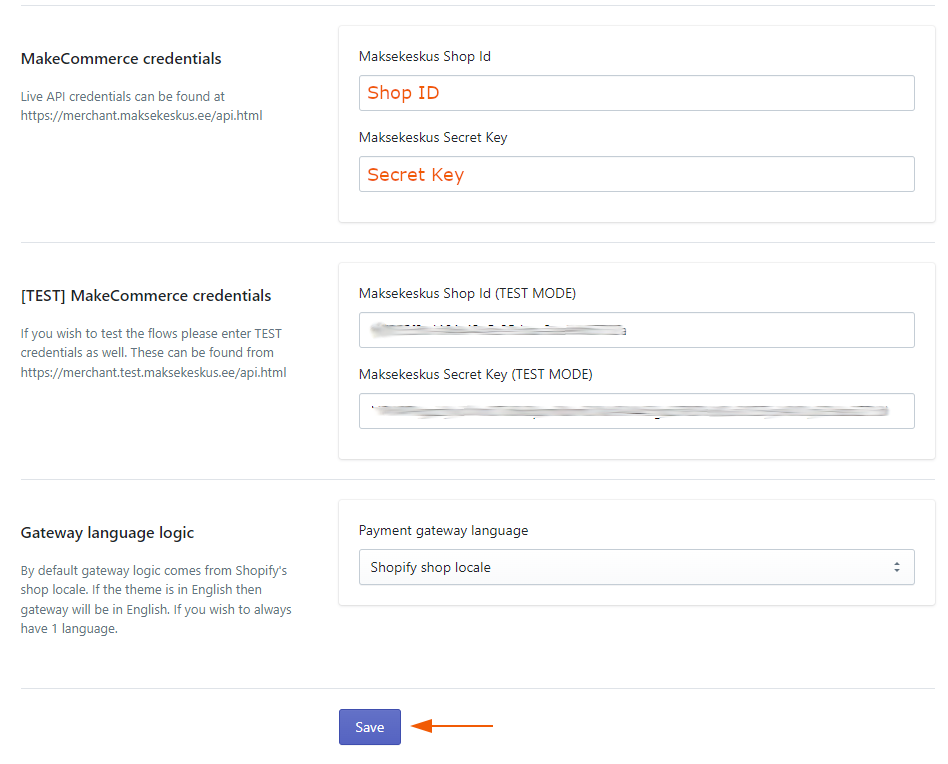
- Insert them into the payment module, and then save the changes accordingly:
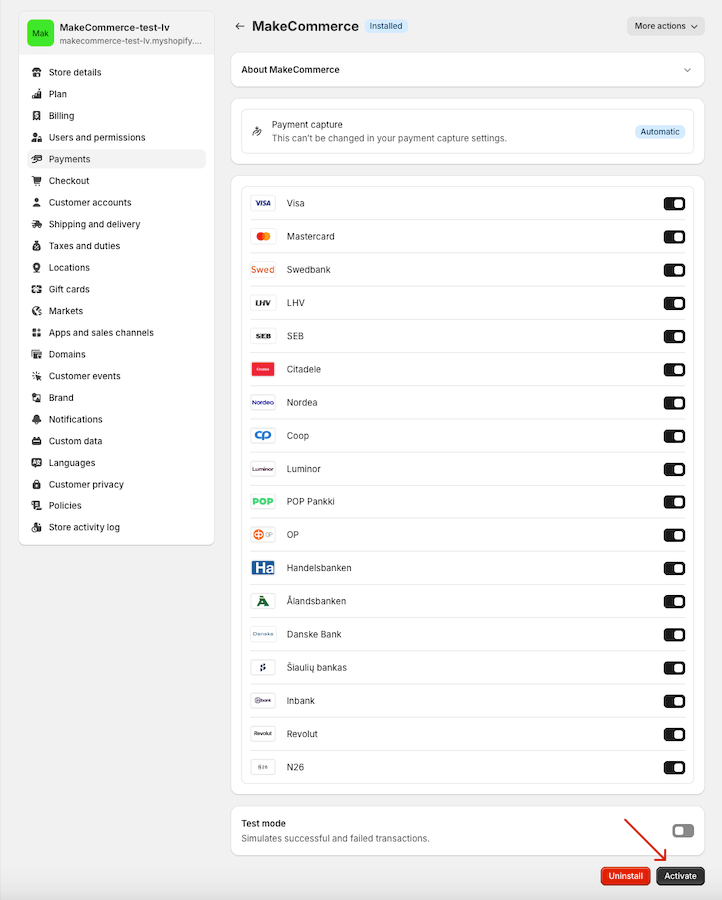
- After saving your changes, you can close this page and return to the previous menu. Refresh the page and you will see a list of payment methods. Here you can choose which payment logos you want to display at checkout in the payment options step.
Good to know! We recommend selecting the logos of all the banks from which you accept payments. However, the functionality does not depend on this choice, as the actual payment method is selected in the MakeCommerce payment gateway. You can select the payment methods at the time of signing the contract or afterwards by writing support@maksekeskus.ee. - If Enable test mode is selected in the Test mode section, test accounts will be used for payments and payments will be simulated. If the checkbox Enable test mode is not ticked, live shop keys will be used and transactions will be monetary.
- As a final step, click the Activate button:

- And now MakeCommerce payments should appear in your online store:
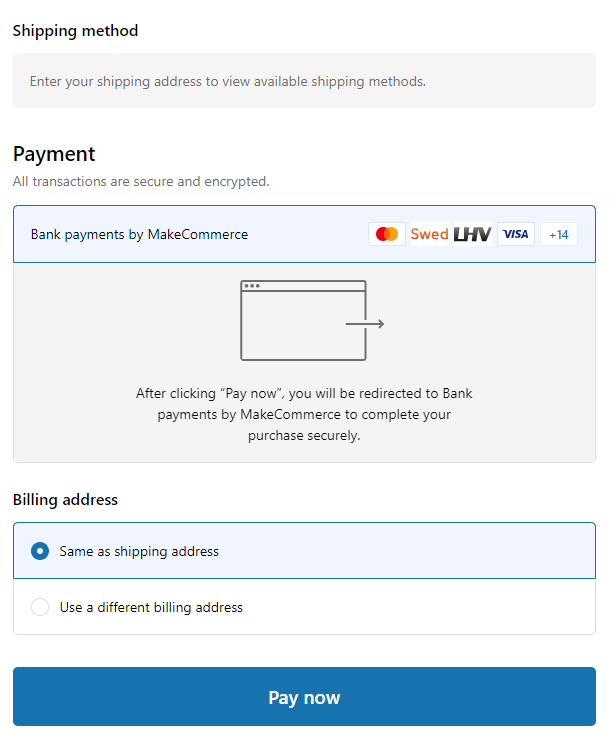
- By clicking the button Pay now the customer will be redirected to the payment method selection view:
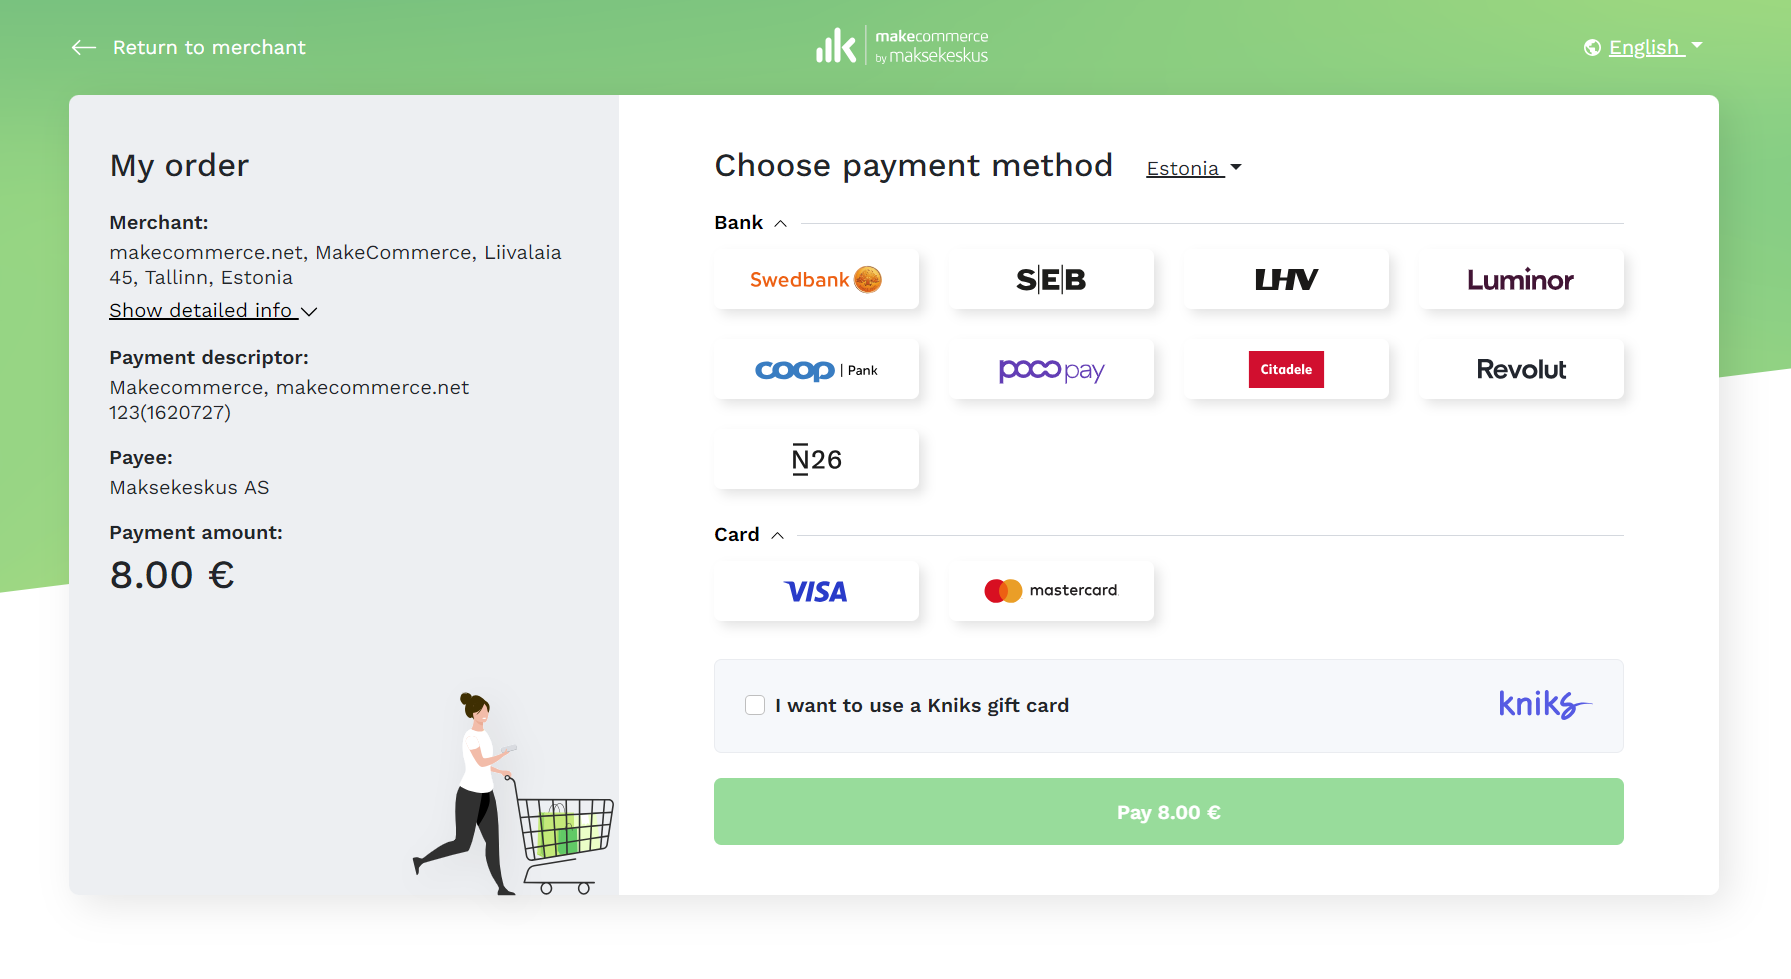
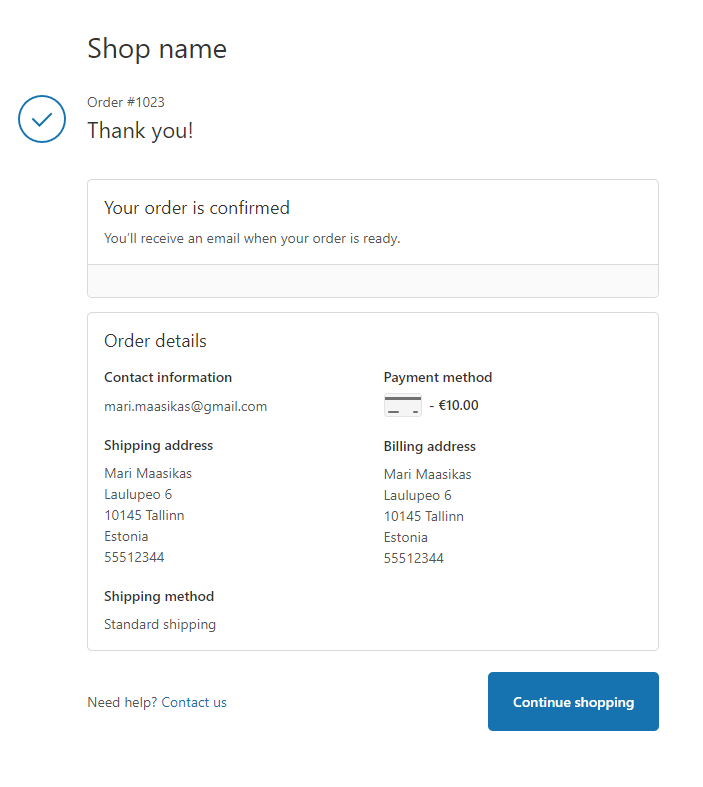
- When choosing to pay by bank payment, the customer is redirected to the internet bank confirmation window with payment details, and must confirm the payment with the authentication method of their choice (e.g. SmartID, code calculator or biometrics). Upon successful payment, the customer will be redirected to the successful payment page.
Here is a video recording of the payment integration setup:
How to set up MakeCommerce shipping to your e-shop?
The steps for integrating the shipping module depend on whether you already have contracts with the shipping companies.
Already have a contract with a shipping company?
If you don’t have a contract, use our Shipping+ service to connect your shop.
If you have any questions, feel free to contact our support – support@maksekeskus.ee!
Happy sales!